Pages

Thursday, November 29, 2007

ADF security in action

In my previous blog we enabled the project for adf security. Now is time to see it in action. I will show how you can add security to a page and to specific button actions. I use in this example the system-jazn-data.xml of the embedded oc4j. You can edit this from the menu tools / embedded oc4j server preferences.


First we make a region with security info so we can see on every page what the security settings are. This region also contains a login and logout button.

I use a backing bean to do this. The login action is done redirecting to this url /adfAuthentication?succes_url=/faces/dept.jspx and the logout is done by this /adfAuthentication?logout=true&end_url=/faces/start.jspx


public class SecurityBean {
public SecurityBean() {
}

public String getSecurityEnabled() {
if (ADFContext.getCurrent().getSecurityContext().isAuthorizationEnabled()){
return "true";
}
return "false";
}

public String getIsAuthenticated() {
if (ADFContext.getCurrent().getSecurityContext().isAuthenticated()){
return "true";
}
return "false";
}

public boolean isAuthenticated() {
return ADFContext.getCurrent().getSecurityContext().isAuthenticated();
}


public String getCurrentUser() {
return ADFContext.getCurrent().getSecurityContext().getUserName();
}

public String doLogOut() throws IOException{
ExternalContext ectx = FacesContext.getCurrentInstance().getExternalContext();
HttpServletResponse response = (HttpServletResponse)ectx.getResponse();
String url = ectx.getRequestContextPath()+"/adfAuthentication?logout=true&end_url=/faces/start.jspx";
response.sendRedirect(url);

return null;
}

public String doLogIn() throws IOException{
ExternalContext ectx = FacesContext.getCurrentInstance().getExternalContext();
HttpServletResponse response = (HttpServletResponse)ectx.getResponse();
String url = ectx.getRequestContextPath()+"/adfAuthentication?succes_url=/faces/dept.jspx" ;
response.sendRedirect(url);

return null;
}


}

In this example I have two pages , the first page start.jspx doesn't have any security so adf security uses the anomynous account.


the second page have security on the page , you need to have the role users to see this page and the navigation buttons are enabled if the user belows to the oc4j-administrators role.

Now let see how we can add page security to a page. To view this page you need to have view right. We can do this by opening the pagedef.

the next step is to add the view rights to the roles users and oc4j-administrators. We now go the pagedef structure window and select the pagedef node and with the right button we open the authorization window.


These security entries are put in system-jazn-data.xml and jazn use the pagedef name as unique entry so make sure you don't have the same pagedef twice on the production server else both pages has the same security.
You can do this also for the binding actions like next, first etc. Now we make sure that you need to have oc4j-administrator role to press next etc.

and we ready to test it.

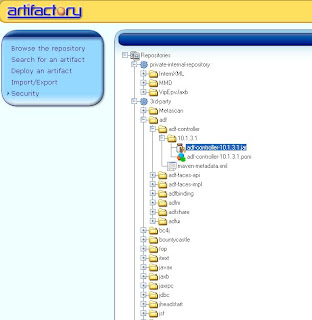
Here you have the example project and the system-jazn-data.xml which you have to put in the config dir of the embedded oc4j . this are the users oc4jadmin / welcome , test / test

Wednesday, November 28, 2007

ADF security in your project

ADF Security implementation can be viewed as an extension to the standard J2EE container security and is executed after the standard security constraints have been processed. It is integrated in ADF of jdeveloper 11g and is implemented dynamically. This gives us many advantages such as changes in roles are immediately active and you can have different permissions in one page. For example in the pagedef you can add rights to roles on specific attributes, pages and methods. In your applications, you can also use Expression Language (EL) to show or hide items on a page based on a user's permissions, which are defined in the run time policy store.

If you use adf security in your application and you also selected anonymous access in the adf wizard then you automatically are logged in as anonymous if this page does not have security and if you go to a page where there is no anonymous security defined then you get a login window or you can start the following url /project-context/adfAuthentication to get the login windows.

Here you define in the pagedef of the page that to see the page you have to have the view permission.

If you run the adf security wizard then the following files are created or changed

workspace_home/.adf/META-INF/adf-config.xml

element sec:JaasSecurityContext added


workspace_home/.adf/META-INF/credential-jazn-data.xml

anonymous login account


workspace_home\src\META-INF\orion-application.xml
workspace_home\src\META-INF\jps-config.xml
workspace_home\src\META-INF\jazn-data.xml

and of course the web.xml


If you start the adf security wizard yourself then select no identity store by step 4. Then you use the jazn of the embedded oc4j, the other options gives jazn errors


Make sure if you run on windows xp that you start jdeveloper in single user mode ( jdeveloper -singleuser) else the jazn editor in the embedded oc4j does nothing.

In the next adf security blog I will demostrate the different security options in a page.

JDeveloper 11g single user mode

I discovered that the jazn configuration (Identity Store) in 11g tp2 of the embedded oc4j didn't work, so I googled a bit and saw the solution of Steve Muench. It seems that jdeveloper 11g is started by default in multiuser mode. That's why it creates a jdeveloper directory with the embedded oc4j in your user folder. The jazn error is caused by a space in the folder name of the user. On windows xp you have your user data in this folder C:\Documents and Settings\ebi15170. You can solve this by starting jdeveloper with the -singleuser option or set the JDEV_USER_DIR environment variable to a folder name with no spaces.

Steve Muench hold a jdeveloper 11g page with more tip so check this out.

Sunday, November 25, 2007

http analyzer to test and monitor ws

The http analyzer is not new in jdeveloper but in 11g Oracle added some new features. You can define now rules in the http analyzer. With these rules you can emulate ws and change your environment. The following rules are supported Tape, URL Substitution, Pass Through and Forward, I will explain these rules later in this blog. You can save and load the web services requests and responses in a ws-i log file, test a web service in the http analyzer in the same way as in the oc4j server and it supports https.

The display of a ws call with his return message is better and this display can also be used to test other web services like you can in the 10.1.3 oc4j container


The http analyzer support rules ,this means that one of the rules has to fire else the calling ws client gets a error. You can put in many rules and the http analyzer tests the rules from the first to the last. If the rulefilter matches then the analyzer does the action and waits for the next ws request

The first rule is forward. Forward does the same as in 10.1.3 , it passes the message on to the real web service.

In the url filter you can set the incoming url of the web service and in the target url you can set the real url of the web service. Filter tester is to test the url filter with the calling url. This can be handy because in the url filter you can define wildcards.
With the tape rule you can test the ws client without the need of the webservice. first you have to save the entries in a ws-i log file then you can use this file to respond to the ws client calls.


The url filter and filter tester are the same as forward rule. The tape path is the ws-i log file of the saved entries. The tape rule can correct the time and size of the entries in the ws-i log file so the returning message to the ws client is valid. Loop tape is necessary if you want to retry the ws client.

The last two rules are url substitution pass through rule. The first you can use if you want to change the url or parts of this url because you deployed it to an oc4j container in stead of the embedded oc4j of jdeveloper.

the pass through rule does nothing if it matches the url filter.

Conclusion, you can use the analyzer perfectly for your test environment because with the tape rule you don't need all the web services to test your ws client and if there is a change in your ws environment you can use the other rules to fix it or let is pass.

jmx datacontrol in jdeveloper 11g

The jmx datacontrol is a new feature of adf. This datacontrol is an interface between the jmx servers and adf. Now you can make a gui on the mbean attributes and operations. In jdeveloper technical 2 preview you can only make a jmx datacontrol. You can't configure it, you have to do it manually but there is no information how to do that. But if you look at the dc-adapters.jar ( this is the datacontrols jar ) You can open the jmx schema. Here we see dat de jmx datacontrol allows you to connect to mbeans servers and give a interface to the attributes and operations of this mbean server.
This datacontrol makes it possible to make a frontend on the mbeans in your own applications. In 10.1.3 you had to go to em website. I think this gives jmx a boost in jdeveloper 11g applications.
Here you see the schema of the jmx datacontrol

Wednesday, November 21, 2007

Yahoo maps with csv and ws url datacontrol

In this example I have a Yahoo maps page where the markers on the maps comes from a csv file which contains our companu offices and it is enriched by a rest web service to get the longitude and latitude coordinates of these locations. The csv and rest webservice are adf url datacontrols. In this example I only have to make a pagedef with the operations and iterators on these datacontrols. The next step is backing bean for calling the operations and collecting the data for the yahoo maps page. Here is the result.

Let's look how we create the adf url datacontrols. For the coordinates I use a web service from geonames. I can call an url with parameters in a normal browser and it gives me a result xml.

I put the parameters of the geonames ws in the source attribute where the values of the parameters are changed to ##abc## in this case ?placename=##place##&postalcode=.....

This datacontrol needs a xsd for the xml output. Geonames don't supply the xsd so we need to generate this with altova xmlspy. If we are ready then we can create a page where we drag loaddata method from the datacontrol, I use an adf parameter form. Then we have to drag the result from the datacontrol to the page ( read only table)


Now we can make an url datacontrol on the csv file with the addresses. the file looks like this

title;phone;street;zipcode;zipcode_alfa;place

Ordina Headquarters;+ 31 30 66 37 000;Ringwade 1;3439;LM;Nieuwegein


You need to have a web server to put the csv on. You can use the embedded oc4j for this.


when you create a page and drag the csv method from the datacontrol as parameter form and the result as read only table, then the result can look like this.

If everything works fine then we are ready to make the maps page and his pagedef. We create the page and then go to the pagedef . Here we put in the methodIterator and the accessorIterator of the two other demo pages. We copy the two methodActions too and we add two table bindings on these method and acessoriterators.

Create the bean and add the bean definition in the afdc-config. In this bean we put in a method which gathers the required data for the markers on the yahoo maps page.


The last step is to put in the yahoo maps javascript in the page and fill the javascript variables with the bean getters


We are ready to test it. This is a jdeveloper 11g technical preview 2 example and this project has some problems to execute the geonames webservice twice in a loop.


Here you can download the example

Friday, November 16, 2007

jmx for starting background processes

The oc4j container support jmx, with this you can use mbeans to check the status of processes change application variables or you can start or stop background processes. You don't need to make a custom page with buttons to see the mbeans you can do this in the enterprise manager website.
If you deploy the ear then you have in the administration page of the deployed application a link to the mbeans.

If you click on this link then you see the mbeans of the application. On the left site you see the registered mbeans and on the right you see two tabs , The first are the attributes and the second tab are the operations where you can start methods

Here we see two operations

Let's start databaseaction, in my example it updates the time variable to the current time

In a mbean you have to define some methods
public MBeanAttributeInfo[] getMBeanAttributeInfo() , the attribute information
public MBeanOperationInfo[] getMBeanOperationInfo(), the supported operations
public String getMBeanName() , the name of the bean
public String getMBeanDescription() , bean description
public MBeanConstructorInfo[] getMBeanConstructorInfo() constructor
Here you see the bean.


public class EmployeesMBean extends StandardMBean implements ManagementMBean {

public EmployeesMBean() throws NotCompliantMBeanException {
super(ManagementMBean.class);
}
private Date time;

public String getMBeanName() {
return this.getClass().getName();
}
public String getMBeanDescription() {
return "jmx example";
}
public MBeanConstructorInfo[] getMBeanConstructorInfo() {
return new MBeanConstructorInfo[] { new MBeanConstructorInfo(getMBeanName(),
"Constructor MBean",
null) };
}
public MBeanAttributeInfo[] getMBeanAttributeInfo() {
MBeanAttributeInfo[] attr =
{ new MBeanAttributeInfo("time", "java.util.Date",
"time when the service is started", true,
false, false)
};
return attr;
}
public MBeanOperationInfo[] getMBeanOperationInfo() {
MBeanOperationInfo[] ops =
new MBeanOperationInfo[] { new MBeanOperationInfo("start",
"start the service.",
null, "void",
MBeanOperationInfo.ACTION),
new MBeanOperationInfo("databaseaction",
"Get the database time",
null, "void",
MBeanOperationInfo.ACTION) };
return ops;
}
public void start() {
this.time = new Date();
}
public void databaseaction() {
this.time = new Date();
}
public Date getTime() {
return time;
}
}


The next step is to make a ServletContextListener which register the bean when the webapp starts up


public class ScottServletContextListener implements ServletContextListener {
public void contextDestroyed(ServletContextEvent sce) {
}
public void contextInitialized(ServletContextEvent sce) {
try {
MBeanServer mbs = MBeanServerFactory.newMBeanServer();

//Taken:
registerMBean(mbs,
"nl.ordina.scott.jmx.EmployeesMBean",
":type=Scott,name=EmployeesMBean");
startServices();
} catch (Throwable t) {
t.printStackTrace();
}
}
private void registerMBean(MBeanServer server, String beanClass,
String naam) {
try {
Object bean = Class.forName(beanClass).newInstance();
ObjectName oName =
new ObjectName(server.getDefaultDomain() + naam);
server.registerMBean(bean, oName);
} catch (ClassNotFoundException e) {
e.printStackTrace();
} catch (IllegalAccessException e) {
e.printStackTrace();
} catch (InstantiationException e) {
e.printStackTrace();
} catch (MalformedObjectNameException e) {
e.printStackTrace();
} catch (NotCompliantMBeanException e) {
e.printStackTrace();
} catch (InstanceAlreadyExistsException e) {
e.printStackTrace();
} catch (MBeanRegistrationException e) {
e.printStackTrace();
}
}
private void startServices() {
startService(":type=Scott,name=EmployeesMBean");
}
private void startService(String objectname) {
MBeanServer mbs = MBeanServerFactory.newMBeanServer();
try {
ObjectName name =
new ObjectName(mbs.getDefaultDomain() + objectname);
mbs.invoke(name, "start", null, null);
} catch (MalformedObjectNameException e) {
e.printStackTrace();
} catch (MBeanException e) {
e.printStackTrace();
} catch (ReflectionException e) {
e.printStackTrace();
} catch (InstanceNotFoundException e) {
e.printStackTrace();
}
}
private void stopServices() {
//Taken:
stopService(":type=Scott,name=EmployeesMBean");
}
private void stopService(String objectname) {
MBeanServer mbs = MBeanServerFactory.newMBeanServer();
try {
ObjectName name =
new ObjectName(mbs.getDefaultDomain() + objectname);
mbs.invoke(name, "stop", null, null);
} catch (MalformedObjectNameException e) {
e.printStackTrace();
} catch (MBeanException e) {
e.printStackTrace();
} catch (ReflectionException e) {
e.printStackTrace();
} catch (InstanceNotFoundException e) {
e.printStackTrace();
}
}
}


the last step is we edit the web.xml for the servercontextlistener


here is the example workspace

Wednesday, November 14, 2007

re-use taskflows in other taskflow apps

In JDeveloper 11g you can re-use taskflow in two ways . Make an adf library or deploy the application to an oc4j 11g container and use a taskflow call with this remote url.
This can be very usefull if you have many applications in your company with the same components like login flow etc. You can also use it if you have a central customer hub and want to maintain this customers from different applications and don't want to make this functionality twice.
First I made an adf taskflow project with an bounded login taskflow. This login flow does not nothing. I de-select the create with page fragment.
This taskflow has two view , the default view is a login and the other is a new user page and a wildcard control flow rule so I can call the succes and abort return activity from both views. Let's create the login and new user page and put in some adf command buttons with the succes,newuser and abort action.
Now we are ready to deploy this to an adf library and to an oc4j container.
Make in this project first a adf library jar deployment and generate this jar. Now you can use this login flow in other projects. Open an other adf taskflow project and add the generated login flow jar to this project.

If you open the adfc-config.xml you see in the component Paletten the login flow. Now you can use this page flow. The only down site is that the pages like new user and login in this login flow can not be used. When you run it it tries to look for the pages in the current webapp and not in the jar.

You can use this option perfectly for your own taskflow templates library.

Let's re-open the login flow project and create a war deployment so we can deploy this webapp to an oc4j 11g container. I use the oc4j container from jdeveloper 11g and put in some enviroment variables to the bin\oc4j.cmd file.
set ORACLE_HOME=D:\oracle\jdevstudio1111_preview2
set JAVA_HOME=D:\oracle\jdevstudio1111_preview2\jdk
set OC4J_JVM_ARGS=-mx512M -ms256M -Xrs -XX:MaxPermSize=128M

We can start the container with bin\oc4j .cmd -start. Make in jdeveloper an application connection to this standalone oc4j and deploy to this application server.
We go to the other project and open the adfc-config.xml and drop a task flow call to this diagram with three control flow cases the first is login to call the login flow and put in a commandbutton with this action , succes then we go back to emp and abort then we go the other page so we can see that abort and succes works.
The last step is to configure the login task flow call.


The remote url is http://localhost:8888/login-ViewController-context-root/faces/adf.task-flow? This is the login webapp url. You can use a backing bean for this so you can use an another url for production. without making more versions. The id is the login task flow id and the last is the login taskflow xml filename /WEB-INF/login-taskflow-definition.xml.

We are ready to start the new application.

Monday, November 12, 2007

j2me ws client application for your mobile phone

In this blog I try to explain how you can build a web service with jdeveloper and how you can connect to this web service with your mobile phone. I build this to get some logging information of the production servers if there is a error. Now I don't have to start up my pc and to check the error out. It is a bit uncertain how long j2me is supported because the mobile phones are getter more powerfull every year. Maybe over a few year you can have j2se on your mobile

In this case I work topdown because I want to know that j2me can generate java code from the wdsl/ xsd files . So I first designed the xsd's and wsdl with altova xmlspy. You can do this with jdeveloper too. Now we are ready to download the j2me toolkit. I have to use j2me toolkit 2.2 for my nokia n95, check your mobile operating system for the right supported version of j2me. Installed it and run utilities in the j2me wireless toolkit 2.2 menu. Next we start the stub generator. Here I discovered that is JAX-RPC Standard Implementation of j2me doesn't support date schema elements. So I had to change the date elements to string.
Now we can download eclipse and eclipseme. Eclipseme is an Eclipse plugin to help develop J2ME MIDlets. Now we can start eclipse and make a new midlet project , the next step is to import j2me toolkit 2.2 so you can select mediacontrolskin.We can import the generated web service client code in this midlet project.


Now we can build a jdeveloper web service from the wsdl. We first create a new project and generate java web service from wsdl and toplink to get the data from the database. We can test the web service by running it.

Now you know that the web service works now we can finish de midlet application. In this case I want a search/parameter form and where the result are displayed in a tablelayout then I can pick a record to see it in a form layout. For this I use J2ME Business Pack. which is a great framework that really works goed. Let's run the client application from eclipse which can emulate your mobile phone.


If I get many request for an example application then I shall make a demo with departments and employees tables of scott

Sunday, November 11, 2007

xml menu in JDeveloper 11g

A new feature in 11g is xml menu where you can define your own menu in xml and then adf can generate the menus with breadcrumb. You only have to make a menu xml and put in some navigation panes in the jsf template. You can have different types of menu on every level of the menu. On the left you see the main and level 1 menus are tabs and level 2 are lists. Under the list menu you see the breadcrumbs.
On the right there is a different menu type, level 1 and 2 menu are a bar menu.

It is very easy to make a xml menu is you already use adf taskflow. On the picture below you see several views. If you click on the diagram and use your right button you can create adf menu.
JDeveloper 11g generates a simple xml with 3 nodes on the same level
On the picture below you see the changes in the diagram. JDeveloper has created a wildcard control flow with control flow cases. Now it is possible to navigate between the pages. You can do it also without a wildcard control flow but then you have to specify for every view two control flow cases to the other views. JDeveloper generates also a bean configuration in adfc-config.xml so you can reference it in your jsf templates

Now we change the menu xml into a menu with different levels, group and a shared menu. A group item is not a jsf page it immediate redirects to a sub item when you click on it. A shared menu is a reference to an another menu xml which is loaded in this menu.


If you want to make a sharednode then you only have to copy the bean config and the menu xml .
The last step is to put in the navigation pane for the different menu levels in the jsf template of your pages. In the attribute hint you can define if you want tabs or bar etc. And we are ready to run it


Here is the workspace zip

Saturday, November 10, 2007

Taskflow train in jdev 11g

In Jdeveloper 11g you can make a train of actions ( a kind of wizard to help the user ) . In this example I make a train where I create a department on the first page and then some employees on the second page. See the pictures below. A train is a bounded taskflow ( it has a start and finish point ) where you can define that is has it's own transaction etc.

Here I make a new department

We are ready creating a department we can click on the next button or on the employees link in de top

Here we can make one or more employees and if we are finished we push on submit or cancel.
On submit we defined that is has to go to the calling page and commit the transaction. Cancel does the same only it rollbacks the transaction

Ok how we make all this. First a make a new adf taskflow with the property create train


open the new task-flow-definition and change the following properties
taskflow reentry not allowed and transaction requires transaction

creating views
The first view from the component palette and change the display property to departments. The second view is on employees and change the display property to employees

specify two taskflow returns.
the first is succes with succes as outcome and commit by end transaction
the second is cancel with cancel as outcome and rollback by end transaction

create two control flow case
one from employees to succes
one from employees to cancel.

The picture below show the result

open the unbounded taskflow drop the train taskflow on the diagram
from dept view (the calling page ) create a control flow case with the name create and create a return control flow case with cancel and one with succes. If you don't mind the outcome you can put in *. By succes you can put in a requery on the department pages

create the department page from the train task flow and put in a department from with train navigation and train button bar.
Now go the pagedef , make a create binding on the department view and the an invoke action where you select the create binding so the department page goes in insert mode

create the employee page from the train task flow with a department form on the top of the page and a employees creation form. We put in a train navigation and a train button bar and a button with submit as text and submit in the action property and a cancel button with action cancel.

We are ready to give it a try.
Here is the workspace zip

Thursday, November 8, 2007

JDeveloper project with Maven / Continuum

If you work on jdeveloper project in teams then you probably experienced that someone checked in bad code or not all the code so the next day nobody can compile the project. Then it is necessary to have a continious build tool and it also does unit tests on the code so you can pro-active react. These build are all open source so it can't be the money if you don't use it in your projects.

The first step to have a maven repository. This stores the javax and oracle jars which are needed for compilation, You have to upload the needed jars into the repos. the others non commercial jars are downloaded automaticaly from public repositories and stored in the local repos. For a good description how to setup a repository see this guide on the theserverside. I use artifactory.


If you work in teams I think you already have subversion or cvs. This is necessary so maven can check out the code every X minutes for a complete rebuild.

Let's download maven

Now we are ready to setup a jdeveloper project . Maven needs a typical structure for a normal project and a webapp project. see the picture below. So you need to change the jdeveloper projects to this directory structure.

You also can do the other way around, make the directory structure, put in your code. Let maven compile the workspace and the download a maven plugin from some adf faces developers. And let this plugin generate jpr files. check out with subversion this url http://svn.apache.org/repos/asf/myfaces/trinidad-maven/trunk/maven-jdev-plugin for the plugin
Let's make a trunc folder with a model and viewcontroller subfolders. In the model we have a src folder with two subfolder main and test. In main\java you put in your java and xml's and in test your unit tests. The viewcontroller structure is a bit different you have here a webapp folder in src/main.

Now we ready the make the maven pom files. The first we make is the main pom where we put in the order of compiling the sub projects and shared used jar files. This pom.xml is located in the trunk directory


Here you see we have two projects model and view controller and one shared jar.
the model pom is a bit different and is located in the model folder


Here you have extra configuration elements for the issue management , in this case I use jira . If the build fails it makes a issue to the developer in jira . The second is subversion scm connection to check out the model code. The third is the continuum configuration who is has to email if there are changes in the build proces.
The build configuration is very import for adf bc ( bc4j) projects because the xml files are very important.


The viewcontroller pom looks like this


Dependency is now the model project


Now we can build the application in maven. the last step is installing continuum where we can load the main pom.xml and we now can configure when and how often it has to build .We also get a total overview about over build projects.