I was searching for some documentation about MDS errors and I came across this online help Oracle® Fusion Middleware Performance Guide 11g Release 1. Just check this out, dont know how long this page will be available ( it is beta).
For example you can use this console logger in your JDeveloper 11g application. It opens automatically when you start your web application.
To activate this just add these context parameters to your web.xml
Monday, May 25, 2009
Thursday, May 21, 2009
Get the full ESB request header of a routing service
Sometimes in an ESB routing service based on a WSDL, I want to retrieve data from the SOAP Header so I can use the xml signature in the xlst transformation. Oracle has made some xslt functions so you can retrieve data from the request header ( for more information see this presentation ) . These XSLT functions can only return the values even when you use xsl:copy-of. So let's make our own XSLT library.
First I start with a java class which returns the whole soap header, this class need to have static methods.
This class need the oraesb.jar to complie, this is located at your soa suite home.
Make a jar deployment profile and put this jar in the extension folder of your JDeveloper ( jdev\extensions ) and restart JDeveloper.
Next step is to make a User defined extension function config file. This file is a xml where we register our getHeader method.
Use this file in the xsl maps tab of the JDeveloper preferences
When we open a XSLT file, we can see our function in the component palette. Just drag this function in the editor
JDeveloper will automatically add the namespace to the xslt
Because this getHeader function give me the escaped soap header back, Let's transform this to xml with a litte help of the parseEscapedXML function.
Now we only have to put our jar with our getHeader function on the soa suite server. Put the jar in the applib folder of the soa suite container. Last step is to add the jar to the system.xml of the soa suite container. Add the jar to the oracle.bpel.common shared library entry.
That's all
First I start with a java class which returns the whole soap header, this class need to have static methods.
package nl.whitehorses.esb.xslt.functions.headers;
import java.io.IOException;
import java.io.PrintWriter;
import java.io.StringWriter;
import oracle.tip.esb.server.headers.ESBHeaderContext;
import org.w3c.dom.Element;
import oracle.xml.parser.v2.XMLDocument;
public class ESBCustomFunctions {
public static String getHeader() throws IOException {
Element requestHeader = ESBHeaderContext.getRequestHeader();
StringWriter sw = new StringWriter();
PrintWriter pw = new PrintWriter(sw);
((XMLDocument)requestHeader.getOwnerDocument()).print(pw);
return sw.toString();
}
}
This class need the oraesb.jar to complie, this is located at your soa suite home.
Make a jar deployment profile and put this jar in the extension folder of your JDeveloper ( jdev\extensions ) and restart JDeveloper.
Next step is to make a User defined extension function config file. This file is a xml where we register our getHeader method.
<?xml version="1.0" encoding="UTF-8"?>
<extension-functions>
<functions xmlns:customESBFunctions="http://www.oracle.com/XSL/Transform/java/nl.whitehorses.esb.xslt.functions.headers.ESBCustomFunctions">
<function name="customESBFunctions:getHeader" as="string">
</function>
</functions>
</extension-functions>
Use this file in the xsl maps tab of the JDeveloper preferences
When we open a XSLT file, we can see our function in the component palette. Just drag this function in the editor
JDeveloper will automatically add the namespace to the xslt
Because this getHeader function give me the escaped soap header back, Let's transform this to xml with a litte help of the parseEscapedXML function.
Now we only have to put our jar with our getHeader function on the soa suite server. Put the jar in the applib folder of the soa suite container. Last step is to add the jar to the system.xml of the soa suite container. Add the jar to the oracle.bpel.common shared library entry.
That's all
Monday, May 18, 2009
Weblogic WS policies and Netbeans & Metro (WSIT)
In JDeveloper 11g and in the Weblogic 10.3 Console it is easy to add a security policy on a web service. But calling these services in a web service client is a different story. So far there is no support for these policies in web service proxy client wizard of JDeveloper 11g. Gerard Davison is doing a great job by making a lot of blog items how to do this programmatically in JDeveloper 11g. But lucky for us there is an alternative. With a little help of Netbeans and Metro it is not so difficult to call these webservices with Wssp1.2-2007 policies.
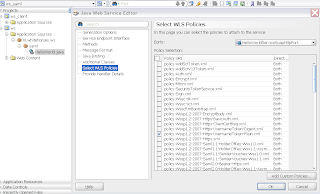
First we start by making a JAX-WS Web Service and adding a policy.
The Helloworld Web Service with HTTPS and plain username policy which I use in this example.
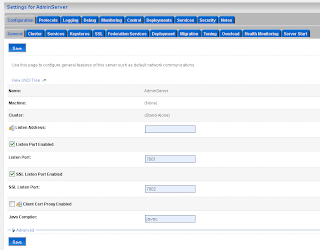
Deploy this on a Weblogic server and make sure the HTTPS port is working. See the keystore / ssl tab of the Weblogic server configuration.
Now we can download the latest Netbeans ( I use version 6.5.1 ) and Metro 1.5. Install Netbeans and add the latest Metro jars to your Glassfish 2 server. ( use ant & metro-on-glassfish.xml for this ). The Weblogic 2007/02 policies are using 256 bits encryption, so we need to download the Java Cryptography Extension (JCE) files and install this on every JDK we are using. The last install step is add to the wsit demo keystores to the glassfish server.
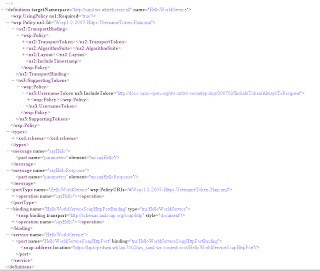
Step 1 is to download the WSDL of the Helloworld Service.
Save this xml to the HelloworldService.wsdl file and open this in a editor. We have to remove the policy reference in the porttype and add this to the binding
to
Else the Netbeans wizard won't detect the policy.
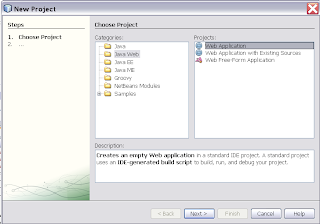
Create a new Web Application in Netbeans
Select the new project and add a new Web Service Client
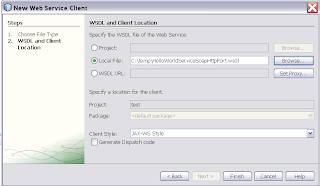
Select the HelloworldService wsdl
Select the just created web service reference and select "Edit Web Service Attributes" on this reference
Deselect "Use development defaults" and provide a Username / password of a valid Weblogic account.
Select for the private key which will be used in the encryption.
And the select the public key of the Weblogic server certificate.
When we take a look at the META-INF folder in the source folder, we can see that the wizard has created a web service configuration file which will be used by Metro to setup the security to the Weblogic Web Service
To test this web service client, we will add a servlet to the project
Deselect the comment and use the right button to add a web service client reference
At the project properties we can call the servlet by using the servlet url in the relative url ( Run)
That's all , it should be working now. For more policies examples see this url , there are some nice examples about Secure Token Service STS.
I am happy Oracle has bought Sun, let's integrate everything to one IDE.
First we start by making a JAX-WS Web Service and adding a policy.
The Helloworld Web Service with HTTPS and plain username policy which I use in this example.
package nl.whitehorses.ws.saml;
import javax.jws.WebService;
import weblogic.jws.Policy;
@WebService(name = "HelloWorldService", portName = "HelloWorldServiceSoapHttpPort")
@Policy(uri = "policy:Wssp1.2-2007-Https-UsernameToken-Plain.xml")
public class HelloWorld {
public HelloWorld() {
}
public String sayHello() {
return "Hello world";
}
}
Deploy this on a Weblogic server and make sure the HTTPS port is working. See the keystore / ssl tab of the Weblogic server configuration.
Now we can download the latest Netbeans ( I use version 6.5.1 ) and Metro 1.5. Install Netbeans and add the latest Metro jars to your Glassfish 2 server. ( use ant & metro-on-glassfish.xml for this ). The Weblogic 2007/02 policies are using 256 bits encryption, so we need to download the Java Cryptography Extension (JCE) files and install this on every JDK we are using. The last install step is add to the wsit demo keystores to the glassfish server.
Step 1 is to download the WSDL of the Helloworld Service.
Save this xml to the HelloworldService.wsdl file and open this in a editor. We have to remove the policy reference in the porttype and add this to the binding
<portType name="HelloWorldService" wsp:PolicyURIs="#Wssp1.2-2007-Https-UsernameToken-Plain.xml">
<operation name="sayHello">
<input message="tns:sayHello"/>
<output message="tns:sayHelloResponse"/>
</operation>
</portType>
<binding name="HelloWorldServiceSoapHttpPortBinding" type="tns:HelloWorldService">
<soap:binding transport="http://schemas.xmlsoap.org/soap/http" style="document"/>
<operation name="sayHello">
<soap:operation soapAction=""/>
<input>
<soap:body use="literal"/>
</input>
<output>
<soap:body use="literal"/>
</output>
</operation>
</binding>
to
<portType name="HelloWorldService">
<operation name="sayHello">
<input message="tns:sayHello" />
<output message="tns:sayHelloResponse" />
</operation>
</portType>
<binding name="HelloWorldServiceSoapHttpPortBinding" type="tns:HelloWorldService">
<ns2:PolicyReference xmlns:ns2="http://www.w3.org/ns/ws-policy" URI="#Wssp1.2-2007-Https-UsernameToken-Plain.xml"/>
<soap:binding transport="http://schemas.xmlsoap.org/soap/http" style="document" />
<operation name="sayHello">
<soap:operation soapAction="" />
<input>
<soap:body use="literal" />
</input>
<output>
<soap:body use="literal" />
</output>
</operation>
</binding>
Else the Netbeans wizard won't detect the policy.
Create a new Web Application in Netbeans
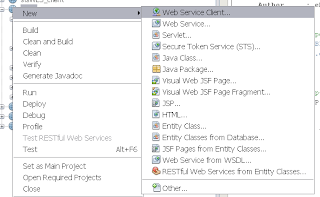
Select the new project and add a new Web Service Client
Select the HelloworldService wsdl
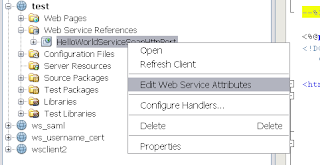
Select the just created web service reference and select "Edit Web Service Attributes" on this reference
Deselect "Use development defaults" and provide a Username / password of a valid Weblogic account.
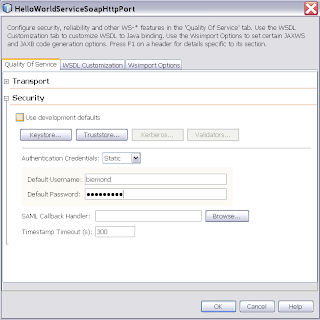
Select for the private key which will be used in the encryption.
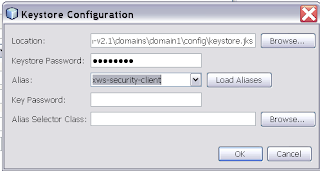
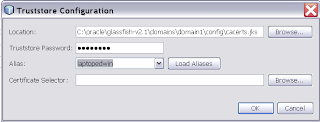
And the select the public key of the Weblogic server certificate.
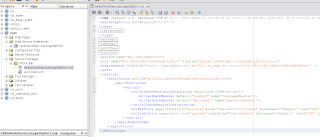
When we take a look at the META-INF folder in the source folder, we can see that the wizard has created a web service configuration file which will be used by Metro to setup the security to the Weblogic Web Service
To test this web service client, we will add a servlet to the project
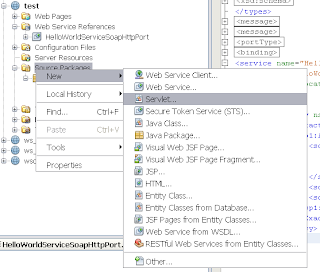
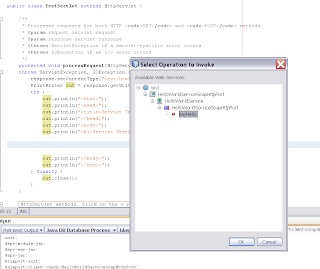
Deselect the comment and use the right button to add a web service client reference
At the project properties we can call the servlet by using the servlet url in the relative url ( Run)
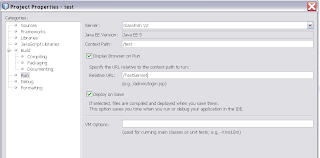
That's all , it should be working now. For more policies examples see this url , there are some nice examples about Secure Token Service STS.
I am happy Oracle has bought Sun, let's integrate everything to one IDE.
Friday, May 15, 2009
SSO with SAML & ADF Security
In my previous blog I got Single Sign On working with J2EE container security. In this blog entry I got it also working with ADF Security. Just create a SAML source and destination site and follow these steps
Create a new relying party for the ADF Security Application on the SAML source site.
Go the WLS console of the Saml source server and go to the myrealm Security Realm
Go to providers -> Credential Mapping -> SAMLCredentialMapper
SAMLCredentialMapper -> Managment -> new Relying Party
Partner ID: rp_00004
Profile: Browser/POST
Target URL: http://localhost:7101/appC/adfAuthentication the url of ADF security servlet on the destination site
Assertion Consumer URL: https://localhost:7102/samlacs/acs
Assertion Consumer Parameters: APID=ap_00002
Saml Destination server , this is the WebLogic Server of the ADF Security Application
Go the myrealm Security Realm -> Providers -> Authentication and select the SAML Identity Assertion provider -> Management -> Asserting Party
Partner ID: ap_00002
Profile: Browser/POST
Target URL: http://localhost:7001/appA This is the main application on the SAML source site
Source Site Redirect URIs: /appC/adfAuthentication The url of ADF Security Servlet
Source Site ITS URL: https://localhost:7002/samlits_ba/its
Source Site ITS Parameters: RPID=rp_00004
On the main site you can add a link to the ADF Security application like this <a href="http://localhost:7101/appC/adfAuthentication">appC</a>
And change login-conf in the web.xml of the ADF Security Application so it uses certificate auhtentication.
<login-config>
<auth-method>CLIENT-CERT</auth-method>
<realm-name>myrealm</realm-name>
</login-config>
The only thing that isn't working yet is the redirecting to the success url after the succesfull authentication by the ADF Security servlet.
Monday, May 11, 2009
SSO with WebLogic 10.3 and SAML
With Weblogic it is relative easy to setup Single Sign On between Servers who has support for SAML. In this blog I will show you, how you can setup SSO between two ADF applications on different WebLogic servers. Off course you can also use Remote Task Flows for this, but when you setup SAML you can use this to protect your web services or use it for identity propagation with OWSM in combination with ESB, BPEL or OSB.
This blog is based on the article of Vikrant Sawant where he did the same with two WLS 9.2 Domains.I will use this blog as the starting point for my next blog entries, I am thinking about the following blog entries, How to use SSO / SAML with ADF Security , SAML with OWSM / OSB / ESB and BPEL. In this blog entry I will use the standard container security.
To make this work we need to have two WLS domains. I created a new domain with the configuration wizard of JDeveloper 11G and enabled the ADF option on this domain. I use the internal Weblogic domain of JDeveloper as the secondary domain.
The new domain will be the SAML Source site but first we need to configure the WebLogic server instance by enabling SSL. SAML will need SSL for the secured communication between the SAML source and destinations domains. For this source domain I will use port 7001 and 7002 (SSL)
Define the keystores, I have my own keystores but you can also use the WLS demo keystores
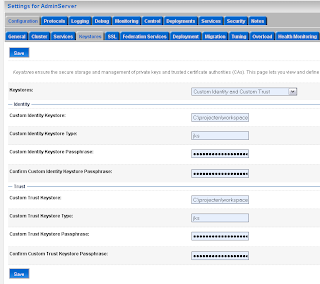
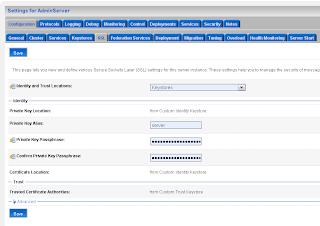
If you use your own keystore then you propably have to set the new private key alias.
Add a SAML 1.1 source site at the Federation Services tab.
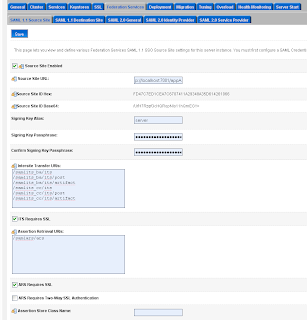
The second step on the SAML Source site is to configure the myrealm security domain. In this step we start by adding a Credential Mapping.
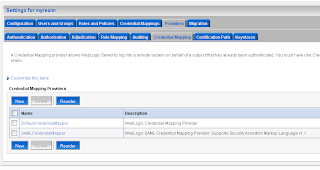
In the provider Specific Tab of the just created credential mapping we have to define the details.
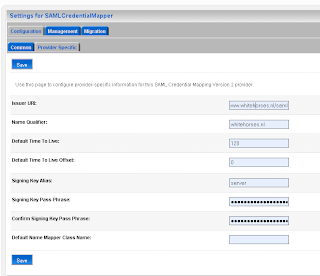
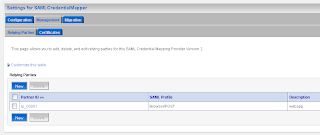
Now we can add the first SAML client (Relying Party ) of this source site. This will be the application which runs on the internal weblogic domain of JDeveloper. The first entry is called rp_00001
Add the url of secured page ( the url of the second application ) and the https port of the SAML destination url. Here we also have to provide the assertion id of the client SAML. This is APID=ap_00001. We will create this later (asserting party ) on the destination SAML domain.
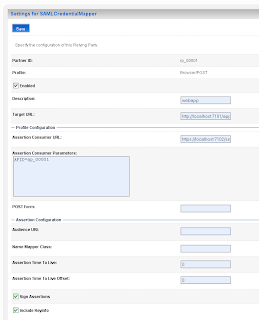
For the communication we need to import the public keys. In my case is this the ca and the server public key. Just export these key from the keystores and rename these keys to the der file extension.
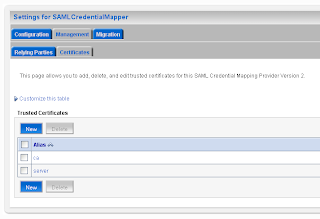
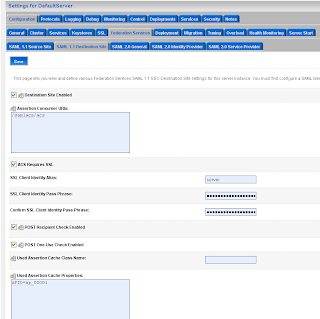
Step 3 is to setup the SAML destination site. I will use the internal Weblogic domain of JDeveloper for this. Default JDeveloper uses port 7101 and in this domain we also need to enable the SSL port ( port 7102 ).
Next go to the Federation Services of the server instance and enable SAML 1.1 destination Site.
Go to the myrealm security domain and add a new SAML authentication.
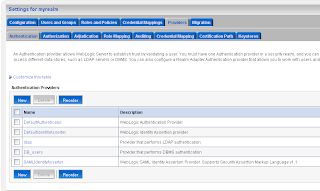
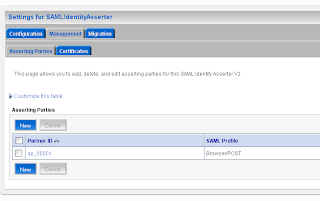
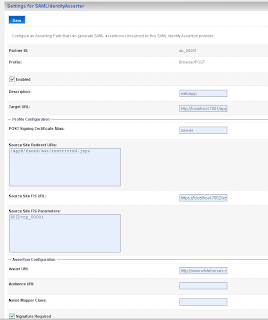
Add a new asserting party.
Here we add the url of the application which run on the source site. And the id of the relying party on the source site.
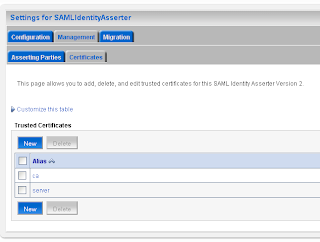
Here we also have to import the public keys of ca and server.
The last WebLogic step is to add a common authorization provider on both domains. I use a LDAP or a SQL authenticator for this. Both WLS domains need to have the same users and groups.
We are finished with the WebLogic configuration. Now we can make two ADF applications. For these application I will use the faces-config.xml and not the unbounded task flow. And I use the standard container security and not ADF Security.
the web.xml of the source application looks like this.
the weblogic.xml of the source and destination application ( to map the valid-user role to the wls user group ).
the web.xml of the destination application, now we have to use CLIENT-CERT.
When the user logs in on the destination site then it will automatically redirected to the source site .
That's all for now.
This blog is based on the article of Vikrant Sawant where he did the same with two WLS 9.2 Domains.I will use this blog as the starting point for my next blog entries, I am thinking about the following blog entries, How to use SSO / SAML with ADF Security , SAML with OWSM / OSB / ESB and BPEL. In this blog entry I will use the standard container security.
To make this work we need to have two WLS domains. I created a new domain with the configuration wizard of JDeveloper 11G and enabled the ADF option on this domain. I use the internal Weblogic domain of JDeveloper as the secondary domain.
The new domain will be the SAML Source site but first we need to configure the WebLogic server instance by enabling SSL. SAML will need SSL for the secured communication between the SAML source and destinations domains. For this source domain I will use port 7001 and 7002 (SSL)
Define the keystores, I have my own keystores but you can also use the WLS demo keystores
If you use your own keystore then you propably have to set the new private key alias.
Add a SAML 1.1 source site at the Federation Services tab.
The second step on the SAML Source site is to configure the myrealm security domain. In this step we start by adding a Credential Mapping.
In the provider Specific Tab of the just created credential mapping we have to define the details.
Now we can add the first SAML client (Relying Party ) of this source site. This will be the application which runs on the internal weblogic domain of JDeveloper. The first entry is called rp_00001
Add the url of secured page ( the url of the second application ) and the https port of the SAML destination url. Here we also have to provide the assertion id of the client SAML. This is APID=ap_00001. We will create this later (asserting party ) on the destination SAML domain.
For the communication we need to import the public keys. In my case is this the ca and the server public key. Just export these key from the keystores and rename these keys to the der file extension.
Step 3 is to setup the SAML destination site. I will use the internal Weblogic domain of JDeveloper for this. Default JDeveloper uses port 7101 and in this domain we also need to enable the SSL port ( port 7102 ).
Next go to the Federation Services of the server instance and enable SAML 1.1 destination Site.
Go to the myrealm security domain and add a new SAML authentication.
Add a new asserting party.
Here we add the url of the application which run on the source site. And the id of the relying party on the source site.
Here we also have to import the public keys of ca and server.
The last WebLogic step is to add a common authorization provider on both domains. I use a LDAP or a SQL authenticator for this. Both WLS domains need to have the same users and groups.
We are finished with the WebLogic configuration. Now we can make two ADF applications. For these application I will use the faces-config.xml and not the unbounded task flow. And I use the standard container security and not ADF Security.
the web.xml of the source application looks like this.
<security-constraint> <web-resource-collection> <web-resource-name>aut</web-resource-name> <url-pattern>/faces/aut/*</url-pattern> </web-resource-collection> <auth-constraint> <role-name>valid-users</role-name> </auth-constraint> </security-constraint> <login-config> <auth-method>BASIC</auth-method> <realm-name>myrealm</realm-name> </login-config> <security-role> <role-name>valid-users</role-name> </security-role>
the weblogic.xml of the source and destination application ( to map the valid-user role to the wls user group ).
<?xml version = '1.0' encoding = 'windows-1252'?> <weblogic-web-app xmlns:xsi="http://www.w3.org/2001/XMLSchema-instance" xsi:schemaLocation="http://www.bea.com/ns/weblogic/weblogic-web-app.xsd" xmlns="http://www.bea.com/ns/weblogic/weblogic-web-app"> <security-role-assignment> <role-name>valid-users</role-name> <principal-name>users</principal-name> </security-role-assignment> </weblogic-web-app>
the web.xml of the destination application, now we have to use CLIENT-CERT.
<security-constraint> <web-resource-collection> <web-resource-name>aut</web-resource-name> <url-pattern>/faces/aut/*</url-pattern> </web-resource-collection> <auth-constraint> <role-name>valid-users</role-name> </auth-constraint> </security-constraint> <login-config> <auth-method>CLIENT-CERT</auth-method> <realm-name>myrealm</realm-name> </login-config> <security-role> <role-name>valid-users</role-name> </security-role>
When the user logs in on the destination site then it will automatically redirected to the source site .
That's all for now.
Sunday, May 3, 2009
OSB Rest service with xml, json output
Inspired by an article RESTify your world..of Emiliano Pecis, I decided to make my own OSB Rest service which can return XML and JSON. To make this work I will use the XMLdb oradb servlet of the Oracle database. T o transform the oradb xml output to the JSON format I used the JSON-LIB libraries.
Here some pictures of the OSB rest service.
Request for order 1000 with XML as outputThe same, with now JSON as output.Request for all the employees with xml as output
Before we start we need to setup de Oracle Database.
Login with sqlplus as xdb. Now we can set the http port of XMLdb.
exec dbms_xdb.sethttpport(8080);
Give your Oracle schema's rights to the oradb servlet. For example the user HR.
grant xdb_webservices to hr;
grant xdb_webservices_over_http to hr;
We can test this by using this url http://localhost:8080/oradb/HR/EMPLOYEES , you will need to authenticate so use the HR account for this. The output would look this.
We can also get one employee by using this url. http://localhost:8080/oradb/HR/EMPLOYEES/ROW[EMPLOYEE_ID=198]
Now we are ready to start with the OSB. First create the Business services where we call the XMLdb servlets. Select any xml as input and http as transport. We need also to create a Service Account with the hr username / password and add this to the Business service.
The next step is to create the OSB Proxy Service. Select messaging as service type and as use text as response messaging type( because we want to return something, else you will get some errors). The transport is http with as endpoint url "/rest". In the message flow we add a Routnode with some If-then.
because the first thing we need to know which type of data is requested. For example employees or orders. In the second If-then we need to know if all the employees are requested or just one. If all is requested then we can call the HR Business Service. If not then we need to retrieve the requested Id and rewrite the endpoint url of the HR Business service. You can achieve this with a routing options component.
This is not enough the new endpoint url has to processed else it won't work. (escape-uri($url/text(), false()) )
The incoming part is ready, we can focus now on the output. Here we have to create a Pipeline Pair.
In the request parameter we need to retrieve the request url and the parameters. To get the url we can use. $inbound/ctx:transport/ctx:request/http:relative-URI/text() and the get the requested output we can use $inbound/ctx:transport/ctx:request/http:query-string/text() . These parameters will be used by the java callout. In the response pipeline I will add a java callout.
This java code transform the XML to JSON. To succesfull use a java methoud in OSB, it need to be a static method and because I need to process the $body variable, I must have a org.apache.xmlbeans.XmlObject method argument.
The JSON output can return output with datatypes, This datatype information isn't provided in the xml output of XMLdb so I made a convertor class for employees and orders. To make this work I use java reflection.
here is a fragment of the code.
The convertor of the employees request looks like this.
In JDeveloper 11g I made a jar deployment and add this jar to the OSB project. Together with the required jars. Our json jar need a reference to the json-lib and the json-lib need a reference to the other jars.
That's all just deploy this to OSB server.
Here is my OSB export jar and the JDeveloper java callout project.
Here some pictures of the OSB rest service.
Request for order 1000 with XML as outputThe same, with now JSON as output.Request for all the employees with xml as output
Before we start we need to setup de Oracle Database.
Login with sqlplus as xdb. Now we can set the http port of XMLdb.
exec dbms_xdb.sethttpport(8080);
Give your Oracle schema's rights to the oradb servlet. For example the user HR.
grant xdb_webservices to hr;
grant xdb_webservices_over_http to hr;
We can test this by using this url http://localhost:8080/oradb/HR/EMPLOYEES , you will need to authenticate so use the HR account for this. The output would look this.
We can also get one employee by using this url. http://localhost:8080/oradb/HR/EMPLOYEES/ROW[EMPLOYEE_ID=198]
Now we are ready to start with the OSB. First create the Business services where we call the XMLdb servlets. Select any xml as input and http as transport. We need also to create a Service Account with the hr username / password and add this to the Business service.
The next step is to create the OSB Proxy Service. Select messaging as service type and as use text as response messaging type( because we want to return something, else you will get some errors). The transport is http with as endpoint url "/rest". In the message flow we add a Routnode with some If-then.
because the first thing we need to know which type of data is requested. For example employees or orders. In the second If-then we need to know if all the employees are requested or just one. If all is requested then we can call the HR Business Service. If not then we need to retrieve the requested Id and rewrite the endpoint url of the HR Business service. You can achieve this with a routing options component.
This is not enough the new endpoint url has to processed else it won't work. (escape-uri($url/text(), false()) )
The incoming part is ready, we can focus now on the output. Here we have to create a Pipeline Pair.
In the request parameter we need to retrieve the request url and the parameters. To get the url we can use. $inbound/ctx:transport/ctx:request/http:relative-URI/text() and the get the requested output we can use $inbound/ctx:transport/ctx:request/http:query-string/text() . These parameters will be used by the java callout. In the response pipeline I will add a java callout.
This java code transform the XML to JSON. To succesfull use a java methoud in OSB, it need to be a static method and because I need to process the $body variable, I must have a org.apache.xmlbeans.XmlObject method argument.
The JSON output can return output with datatypes, This datatype information isn't provided in the xml output of XMLdb so I made a convertor class for employees and orders. To make this work I use java reflection.
here is a fragment of the code.
private static void invoke(Object inst,Method m, JSONObject obj){
try {
m.invoke(inst, new Object[] { obj });
} catch (IllegalAccessException e) {
e.printStackTrace();
} catch (InvocationTargetException e) {
e.printStackTrace();
}
}
private static JSONArray convert(JSONArray json,String type) {
ListIterator list = json.listIterator();
Class dynamicConvertorClass = null;
Object clazzInst =null;
Method m = null;
try {
dynamicConvertorClass = Class.forName("nl.whitehorses.json.convertor."+type.substring(0, 1).toUpperCase() + type.substring(1).toLowerCase());
clazzInst = dynamicConvertorClass.newInstance();
m = dynamicConvertorClass.getMethod("changeType", new Class[] { JSONObject.class });
} catch (ClassNotFoundException e) {
e.printStackTrace();
} catch (InstantiationException e) {
e.printStackTrace();
} catch (IllegalAccessException e) {
e.printStackTrace();
} catch (NoSuchMethodException e) {
e.printStackTrace();
}
while ( list.hasNext() ) {
JSONObject obj = (JSONObject)list.next();
invoke (clazzInst,m,obj);
}
return json;
}
private static JSONObject convert(JSONObject json,String type) {
Class dynamicConvertorClass = null;
Object clazzInst =null;
Method m = null;
try {
dynamicConvertorClass = Class.forName("nl.whitehorses.json.convertor."+type.substring(0, 1).toUpperCase() + type.substring(1).toLowerCase());
clazzInst = dynamicConvertorClass.newInstance();
m = dynamicConvertorClass.getMethod("changeType", new Class[] { JSONObject.class });
} catch (ClassNotFoundException e) {
e.printStackTrace();
} catch (InstantiationException e) {
e.printStackTrace();
} catch (IllegalAccessException e) {
e.printStackTrace();
} catch (NoSuchMethodException e) {
e.printStackTrace();
}
invoke (clazzInst,m,json);
return json;
}
public static String xmlToJson(XmlObject xml, String type, String output)
{
if ( type.indexOf("/") > 0 ) {
type = type.substring(0,type.indexOf("/"));
}
System.out.println("type "+type);
System.out.println("content "+xml.xmlText());
if ( output.equalsIgnoreCase("output=json") ){
if ( !type.equalsIgnoreCase("not")) {
XMLSerializer ser = new XMLSerializer();
Object res = ser.read( xml.xmlText() );
if ( res instanceof JSONArray ) {
JSONArray json = (JSONArray) res;
json = convert(json,type);
return json.toString(1,0);
}
if ( res instanceof JSONObject ) {
JSONObject json = (JSONObject) res;
json = convert(json,type);
return json.toString(1,0);
}
}
}
return xml.xmlText();
}
The convertor of the employees request looks like this.
public void changeType(JSONObject obj){
Object a = obj.get("SALARY");
if ( a!= null) {
obj.put("SALARY",new Float(a.toString()));
}
a = obj.get("EMPLOYEE_ID");
if ( a!= null) {
obj.put("EMPLOYEE_ID",new Float(a.toString()));
}
a = obj.get("MANAGER_ID");
if ( a!= null) {
obj.put("MANAGER_ID",new Float(a.toString()));
}
a = obj.get("DEPARTMENT_ID");
if ( a!= null) {
obj.put("DEPARTMENT_ID",new Float(a.toString()));
}
a = obj.get("HIRE_DATE");
SimpleDateFormat sdfInput = new SimpleDateFormat ("d-MMM-yy") ;
Date date = null;
try {
date = sdfInput.parse(a.toString());
} catch (ParseException e) {
e.printStackTrace();
}
if ( a!= null) {
obj.put("HIRE_DATE",date);
}
In JDeveloper 11g I made a jar deployment and add this jar to the OSB project. Together with the required jars. Our json jar need a reference to the json-lib and the json-lib need a reference to the other jars.
That's all just deploy this to OSB server.
Here is my OSB export jar and the JDeveloper java callout project.
Subscribe to:
Posts (Atom)