First we start by adding a standard OSB WS-Policy. Open the WSDL of a proxy service where we add for example the signing policy. We always need to add wsp:UsingPolicy element else OSB won't detect the wanted security policy
<?xml version="1.0" encoding="UTF-8"?>
<definitions targetNamespace="http://saml.ws.whitehorses.nl/"
name="HelloWorldService" xmlns:soap="http://schemas.xmlsoap.org/wsdl/soap/"
xmlns:tns="http://saml.ws.whitehorses.nl/" xmlns:xsd="http://www.w3.org/2001/XMLSchema"
xmlns="http://schemas.xmlsoap.org/wsdl/" xmlns:wsp="http://schemas.xmlsoap.org/ws/2004/09/policy">
<wsp:UsingPolicy wsdl:Required="true" xmlns:wsdl="http://schemas.xmlsoap.org/wsdl/"/>
<types>
 <xsd:schema>
  <xsd:import namespace="http://saml.ws.whitehorses.nl/" schemaLocation="Helloworld.xsd"/>
 </xsd:schema>
</types>
Add the Signing policy to a operation or put this in a other part of the WSDL see this url for more information. In this case I can use wsp:Policy with a PolicyReference and the URI is policy:Sign.xml . If you want encryption then you can use policy:Encrypt.xml as URI or use policy:Auth.xml for ws authentication. Off course you can combine policies.
<binding name="HelloWorldServiceSoapHttpPortBinding" type="tns:HelloWorldService">
 <soap:binding transport="http://schemas.xmlsoap.org/soap/http" style="document"/>
 <operation name="sayHello">
       <wsp:Policy>
         <wsp:PolicyReference URI="policy:Sign.xml"/>
       </wsp:Policy>
You don't have to use the OSB standard policies, you can also add your own ws-policy ( in OSB 10.3 you can only use the policy definition of WLS 9, so don't expect you can make policies which uses the 2005 or 2007 WS-Security standard). Here is a example of a custom policy.
<?xml version="1.0"?>
<wsp:Policy wsu:Id="X509v3"
xmlns:wsp="http://schemas.xmlsoap.org/ws/2004/09/policy"
xmlns:sp="http://schemas.xmlsoap.org/ws/2005/07/securitypolicy"
xmlns:wsu="http://docs.oasis-open.org/wss/2004/01/oasis-200401-wss-wssecurity-utility-1.0.xsd">
<sp:InitiatorToken>
 <wsp:Policy>
  <sp:X509Token
   sp:IncludeToken="http://schemas.xmlsoap.org/ws/2005/07/securitypolicy/IncludeToken/AlwaysToRecipient">
   <wsp:Policy>
    <sp:RequireThumbprintReference />
    <sp:WssX509V3Token10 />
   </wsp:Policy>
  </sp:X509Token>
 </wsp:Policy>
</sp:InitiatorToken>
<sp:RecipientToken>
 <wsp:Policy>
  <sp:X509Token
   sp:IncludeToken="http://schemas.xmlsoap.org/ws/2005/07/securitypolicy/IncludeToken/Never">
   <wsp:Policy>
    <sp:RequireThumbprintReference />
    <sp:WssX509V3Token10 />
   </wsp:Policy>
  </sp:X509Token>
 </wsp:Policy>
</sp:RecipientToken>
<sp:AlgorithmSuite>
 <wsp:Policy>
  <sp:TripleDesRsa15 />
 </wsp:Policy>
</sp:AlgorithmSuite>
<sp:Layout>
 <wsp:Policy>
  <sp:Strict />
 </wsp:Policy>
</sp:Layout>
<sp:IncludeTimestamp />
<sp:OnlySignEntireHeadersAndBody />
</wsp:Policy>
The value of the wsu:Id attribute if important for the WS policy reference in the WSDL of the proxy service
<binding name="HelloWorldServiceSoapHttpPortBinding" type="tns:HelloWorldService">
 <soap:binding transport="http://schemas.xmlsoap.org/soap/http" style="document"/>
 <operation name="sayHello">
       <wsp:Policy>
         <wsp:PolicyReference URI="policy:X509v3"/>
       </wsp:Policy>
In this case the URI has policy:X509v3 as value
The next step is to make some keystores for WebLogic and OSB. We need to create 509 v3 certificates and import these certificates in a java 1.6 keystore for signing and encryption.
We need to have 509 version 3 certificates because we need the SubjectKeyIdentifier extension. This is only supported in version 3 of 509 and only OpenSSL can generate these certificates.
You can use self signed v3 certificates, for more info see this Glen Mazza's weblog. I'll use a CA.
#first make a CA request
C:\tools\OpenSSL\bin\openssl genrsa -des3 -out C:\projecten\certs2\ca.key 4096 -rand random
#self sign our CA certificate
C:\tools\OpenSSL\bin\\openssl req -new -x509 -days 3650 -config C:\projecten\certs2\ca.conf -key C:\projecten\certs2\ca.key -out C:\projecten\certs2\ca.crt
# make serial.txt file in C:\projecten\certs2\ and add 01 in this file
# make an empty index.txt file in C:\projecten\certs2\
Download the ca.conf which will be used to sign the certificates
# generate a server request and use servername with the domain name as common name CN
c:\tools\openssl\bin\openssl genrsa -des3 -out C:\projecten\certs2\server.key 4096
c:\tools\openssl\bin\openssl req -newkey rsa:1024 -nodes -keyout C:\projecten\certs2\server.key -out C:\projecten\certs2\server.csr -config C:\projecten\certs2\ca.conf
# sign the server request with your CA key
c:\tools\openssl\bin\openssl ca -in C:\projecten\certs2\server.csr -out C:\projecten\certs2\server.pem -keyfile C:\projecten\certs2\ca.key -cert c:\projecten\certs2\ca.crt -config C:\projecten\certs2\ca.conf
# export server
c:\tools\openssl\bin\openssl pkcs12 -export -inkey C:\projecten\certs2\server.key -in C:\projecten\certs2\server.pem -out C:\projecten\certs2\server.p12 -name server
C:\java\jdk160_05\bin\keytool -importkeystore -destkeystore C:\projecten\certs2\keystore.jks -deststorepass welcome -srckeystore C:\projecten\certs2\server.p12 -srcstorepass welcome -srcstoretype pkcs12
C:\java\jdk160_05\bin\keytool -list -keystore C:\projecten\certs2\keystore.jks -storepass welcome
C:\java\jdk160_05\bin\keytool -exportcert -alias server -storepass welcome -keystore C:\projecten\certs2\keystore.jks -file C:\projecten\certs2\server.cer
C:\java\jdk160_05\bin\keytool -printcert -file C:\projecten\certs2\server.cer
# generate client request
c:\tools\openssl\bin\openssl genrsa -des3 -out C:\projecten\certs2\client.key 4096
c:\tools\openssl\bin\openssl req -newkey rsa:1024 -nodes -keyout C:\projecten\certs2\client.key -out C:\projecten\certs2\client.csr -config C:\projecten\certs2\ca.conf
# sign client request
c:\tools\openssl\bin\openssl ca -in C:\projecten\certs2\client.csr -out C:\projecten\certs2\client.pem -keyfile C:\projecten\certs2\ca.key -cert c:\projecten\certs2\ca.crt -config C:\projecten\certs2\ca.conf
# export client
c:\tools\openssl\bin\openssl pkcs12 -export -inkey C:\projecten\certs2\client.key -in C:\projecten\certs2\client.pem -out C:\projecten\certs2\client.p12 -name client
C:\java\jdk160_05\bin\keytool -importkeystore -destkeystore C:\projecten\certs2\keystore.jks -deststorepass welcome -srckeystore C:\projecten\certs2\client.p12 -srcstorepass welcome -srcstoretype pkcs12
C:\java\jdk160_05\bin\keytool -list -keystore C:\projecten\certs2\keystore.jks -storepass welcome
C:\java\jdk160_05\bin\keytool -exportcert -alias client -storepass welcome -keystore C:\projecten\certs2\keystore.jks -file C:\projecten\certs2\client.cer
C:\java\jdk160_05\bin\keytool -printcert -file C:\projecten\certs2\client.cer
# make a truststore with the ca and the public keys
C:\java\jdk160_05\bin\keytool -import -file c:\projecten\certs2\ca.crt -alias ca -trustcacerts -keystore C:\projecten\certs2\trust.jks -storepass welcome -keypass welcome
C:\java\jdk160_05\bin\keytool -import -file C:\projecten\certs2\client.cer -alias client -keystore C:\projecten\certs2\trust.jks -storepass welcome -keypass welcome
C:\java\jdk160_05\bin\keytool -import -file C:\projecten\certs2\server.cer -alias server -keystore C:\projecten\certs2\trust.jks -storepass welcome -keypass welcome
C:\java\jdk160_05\bin\keytool -list -keystore C:\projecten\certs2\trust.jks -storepass welcome
The next step is to configure Weblogic. First we add the new keystores and configure SSL and add a new PKI Credential mapping provider. The PKI Credential mapping provider will be used by OSB for the XMLsignature and encryption. The trust keystore will be used to check if the signer certificate is trusted.
Go to the OSB server in the WLS console
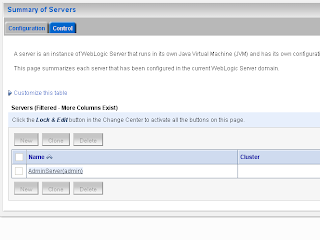 In the keystore tab we will add our keystores
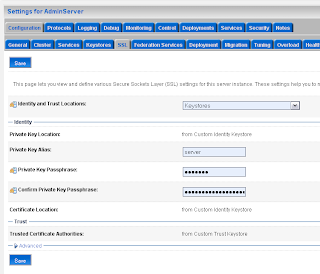
In the SSL tab we will use the server certificate which has the server + domain name as Common name so Internet explorer won't complain that the certificate and server name does not match.
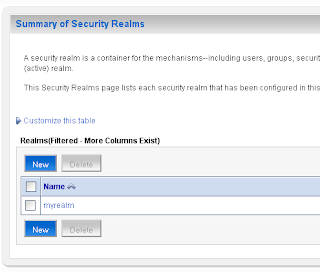
Select the myrealm Security Realm where we will add a new PKI Credential Mapping provider
In the Providers tab we will create a new PKI Credential Mapping
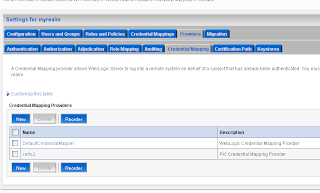 Select the just created PKI credential mapping and fill the values in the Provider Specific tab. Use the keystore and not the trust keystore for this
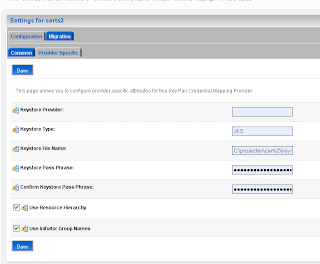 We are finished in the Weblogic Console and we can go the OSB console where we have to create a new Service Key provider and configure the Proxy service so it uses this provider.
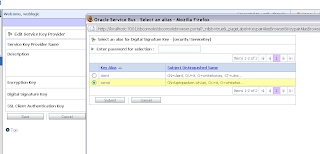
Create a new Service Key provider. This how it looks like in the Workshop but this does not work because eclipse can't retrieve the certificates of the PKI credential mapping provider.
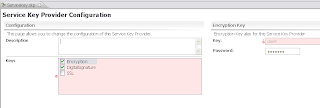
So we have to use the OSB console to add the right certificate for signing and encryption to the Service Key Provider.
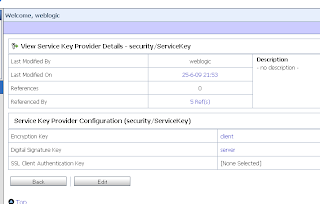 Now we see the certificates of the Weblogic PKI Credential mapping. If you don't see this then probably you don't use 509 version 3 certifcates.
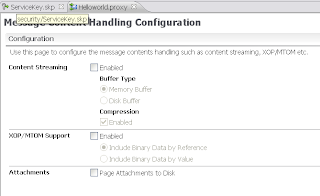
The last step is to configure the proxy service. Here we have to disable XOP/MTOM support
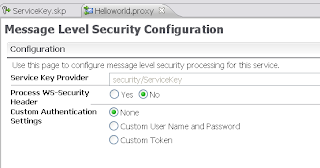
 And select the Service Key Provider
Now we can test the proxy service by invoking the WS and selecting the Service Key Provider.
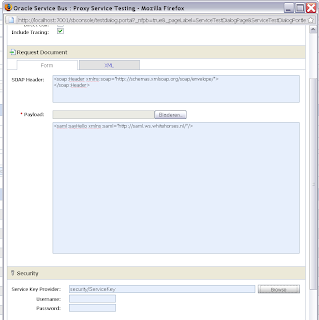 With this as result
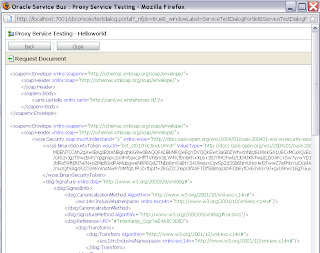 And this is how the WSDL with signing looks like
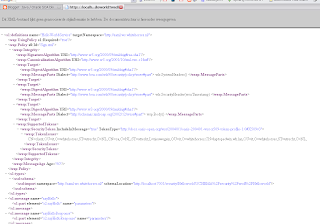 That's all.
If you want to use OSB 10.3 security with Soa Suite 11g R1 then you should read this 11g documentation, This explains how to change the OSB encrypt and sign policy so it works with FMW 11g.


