Pages

Saturday, August 21, 2010

The things you need to do for OWSM 11g policies

In Fusion Middleware 11g it is not so difficult to protect your JAX-WS Web services or your Composite Services. You just need to add an Oracle Web Service Manager service policy to this Web Service. So that's all the work for the developer or release manager. And now the work starts for the Administrator. This persons need to be familiar with the Enterprise Manager, WebLogic Console, OpenSLL and with the keytool utility of the JDK. In this blogpost I will show what you need to do if you choose for a particular OWSM Policy.


Let's start simple with one of the following policies
oracle/wss_http_token_service_policy
oracle/wss_username_token_service_policy

These policies can be used for HTTP Basic Authentication or for an Username Token in a SOAP message. The only thing you need to do for these policies is to add some Users to the myrealm Security Realm in the WebLogic Console.
On the client side you need to do the following.
execute = new Execute();
SecurityPolicyFeature[] securityFeatures =
            new SecurityPolicyFeature[] { new SecurityPolicyFeature("oracle/wss_username_token_client_policy") };
Request_Response_ptt request_Response_ptt = execute.getRequest_Response_pt(securityFeatures);
    
// Add your code to call the desired methods.
Map<String, Object> reqContext = ((BindingProvider) request_Response_ptt).getRequestContext();
reqContext.put(BindingProvider.USERNAME_PROPERTY, "test" );
reqContext.put(BindingProvider.PASSWORD_PROPERTY, "weblogic1" );
       
Request req = new Request();
req.setName("edwin");
req.setMessage("hi");
Response resp = request_Response_ptt.requestResponse(req);


The Message protection policies
oracle/wss10_message_protection_service_policy
oracle/wss11_message_protection_service_policy
When you choose for one of these policies you need to generate a Server certificate for encryption and put this in a Java keystore and for the Client side you also need to make a Keystore but this contains only the public key of this Server encryption certificate ( this is in case of the wss11, for the wss10 you also need to generate a client certificate besides the public key of server, see the x509_token_with_message_protection policies how to do this. ).

To add your Server keystore to FMW, you need to go to the Enterprise Manager and select your Weblogic Domain. In the menu go to the Security / Security Provider Configuration page. And on this page you can import your Java keystore. Before you start you need to copy your keystore to your domain folder and put this in the config/fmwconfig folder.

In this example I used two certificates one for the signature and one for the encryption. For the wss11 Message protection Service policies you only need the encryption certificate.
On the client side you need to load the client keystore and the public key of server encryption certificate. 
execute = new Execute();
SecurityPolicyFeature[] securityFeatures =
    new SecurityPolicyFeature[] { new SecurityPolicyFeature("oracle/wss11_message_protection_client_policy") };
Request_Response_ptt request_Response_ptt = execute.getRequest_Response_pt(securityFeatures);
// Add your code to call the desired methods.
Map<String, Object> reqContext = ((BindingProvider) request_Response_ptt).getRequestContext();

reqContext.put(ClientConstants.WSSEC_KEYSTORE_TYPE, "JKS");
reqContext.put(ClientConstants.WSSEC_KEYSTORE_LOCATION, "C:/client_keystore.jks");
reqContext.put(ClientConstants.WSSEC_KEYSTORE_PASSWORD, "welcome");

reqContext.put(ClientConstants.WSSEC_ENC_KEY_ALIAS, "server_encr");
reqContext.put(ClientConstants.WSSEC_ENC_KEY_PASSWORD, "welcome");
reqContext.put(ClientConstants.WSSEC_RECIPIENT_KEY_ALIAS, "server_encr");

Request req = new Request();
req.setName("edwin");
req.setMessage("hi");
Response resp = request_Response_ptt.requestResponse(req);
For the wss10_message_protection_service_policy you need to do the following.
execute = new Execute();
SecurityPolicyFeature[] securityFeatures =
    new SecurityPolicyFeature[] { new SecurityPolicyFeature("oracle/wss10_message_protection_client_policy") };
Request_Response_ptt request_Response_ptt = execute.getRequest_Response_pt(securityFeatures);
// Add your code to call the desired methods.
Map<String, Object> reqContext = ((BindingProvider) request_Response_ptt).getRequestContext();

reqContext.put(ClientConstants.WSSEC_KEYSTORE_TYPE, "JKS");
reqContext.put(ClientConstants.WSSEC_KEYSTORE_LOCATION, "C:/client_keystore.jks");
reqContext.put(ClientConstants.WSSEC_KEYSTORE_PASSWORD, "welcome");

reqContext.put(ClientConstants.WSSEC_ENC_KEY_ALIAS, "client1");
reqContext.put(ClientConstants.WSSEC_ENC_KEY_PASSWORD, "welcome");
reqContext.put(ClientConstants.WSSEC_RECIPIENT_KEY_ALIAS, "server_encr");

reqContext.put(ClientConstants.WSSEC_SIG_KEY_ALIAS, "client1");  
reqContext.put(ClientConstants.WSSEC_SIG_KEY_PASSWORD, "welcome");

Request req = new Request();
req.setName("edwin");
req.setMessage("hi");
Response resp = request_Response_ptt.requestResponse(req);

The above policies can also be combined. Like in these policies.
oracle/wss10_username_token_with_message_protection_service_policy
oracle/wss11_username_token_with_message_protection_service_policy


For these policies you need to a create user in the WebLogic Console for the username token and generate a server and client keystore for the message protection part.
On the client side you need to the following.
execute = new Execute();
SecurityPolicyFeature[] securityFeatures =
    new SecurityPolicyFeature[] { new SecurityPolicyFeature("oracle/wss11_username_token_with_message_protection_client_policy") };
Request_Response_ptt request_Response_ptt = execute.getRequest_Response_pt(securityFeatures);
// Add your code to call the desired methods.
Map<String, Object> reqContext = ((BindingProvider) request_Response_ptt).getRequestContext();
reqContext.put(BindingProvider.USERNAME_PROPERTY, "test" );
reqContext.put(BindingProvider.PASSWORD_PROPERTY, "weblogic1" );

reqContext.put(ClientConstants.WSSEC_KEYSTORE_TYPE, "JKS");
reqContext.put(ClientConstants.WSSEC_KEYSTORE_LOCATION, "C:/client_keystore.jks");
reqContext.put(ClientConstants.WSSEC_KEYSTORE_PASSWORD, "welcome");

reqContext.put(ClientConstants.WSSEC_ENC_KEY_ALIAS, "server_encr");
reqContext.put(ClientConstants.WSSEC_ENC_KEY_PASSWORD, "welcome");
reqContext.put(ClientConstants.WSSEC_RECIPIENT_KEY_ALIAS, "server_encr");

Request req = new Request();
req.setName("edwin");
req.setMessage("hi");
Response resp = request_Response_ptt.requestResponse(req);
For the wss10_username_token_with_message_protection_service_policy you need to do the following. ( and a need a client certificate and the public key of the server )
execute = new Execute();
SecurityPolicyFeature[] securityFeatures =
    new SecurityPolicyFeature[] { new SecurityPolicyFeature("oracle/wss10_username_token_with_message_protection_client_policy") };
Request_Response_ptt request_Response_ptt = execute.getRequest_Response_pt(securityFeatures);
// Add your code to call the desired methods.
Map<String, Object> reqContext = ((BindingProvider) request_Response_ptt).getRequestContext();

reqContext.put(BindingProvider.USERNAME_PROPERTY, "test" );
reqContext.put(BindingProvider.PASSWORD_PROPERTY, "weblogic1" );

reqContext.put(ClientConstants.WSSEC_KEYSTORE_TYPE, "JKS");
reqContext.put(ClientConstants.WSSEC_KEYSTORE_LOCATION, "C:/client_keystore.jks");
reqContext.put(ClientConstants.WSSEC_KEYSTORE_PASSWORD, "welcome");

reqContext.put(ClientConstants.WSSEC_ENC_KEY_ALIAS, "client1");
reqContext.put(ClientConstants.WSSEC_ENC_KEY_PASSWORD, "welcome");
reqContext.put(ClientConstants.WSSEC_RECIPIENT_KEY_ALIAS, "server_encr");

reqContext.put(ClientConstants.WSSEC_SIG_KEY_ALIAS, "client1");  
reqContext.put(ClientConstants.WSSEC_SIG_KEY_PASSWORD, "welcome");

Request req = new Request();
req.setName("edwin");
req.setMessage("hi");
Response resp = request_Response_ptt.requestResponse(req);

The last part of this blogpost I will explain the following policies
oracle/wss10_x509_token_with_message_protection_service_policy
oracle/wss11_x509_token_with_message_protection_service_policy

These policies will use the client certificate for the signature and the public key of the server encryption certificate for the encryption.
So we start by making some keystores with some certificates. I don't use self signed certificates because then for every new client I need to update the server keystore and reboot the FMW server. Now I only have to import the CA public certificate in the Server keystore. This is how my Server keystore looks like

It got a private certificate for the server signature and for encryption. The CA public key is trusted.

For the client I have this keystore. ( Every customer / application can have its own client keystore )

The CA and Server encryption certificates are public certificates and are trusted.
Because the FMW Server does not know this client certificate ( it only knows the CA ) you need to add a new user in the myrealm Secuirty Realm in the WebLogic Console. The password of this user is not important, the only requirement is that the common name of this client certificate is the same as the WebLogic Username.

And as last the Client code, where we need to provide the client signature certificate details.
execute = new Execute();
SecurityPolicyFeature[] securityFeatures =
    new SecurityPolicyFeature[] { new SecurityPolicyFeature("oracle/wss11_x509_token_with_message_protection_client_policy") };
Request_Response_ptt request_Response_ptt = execute.getRequest_Response_pt(securityFeatures);
// Add your code to call the desired methods.
Map<String, Object> reqContext = ((BindingProvider) request_Response_ptt).getRequestContext();

reqContext.put(ClientConstants.WSSEC_KEYSTORE_TYPE, "JKS");
reqContext.put(ClientConstants.WSSEC_KEYSTORE_LOCATION, "C:/client_keystore.jks");
reqContext.put(ClientConstants.WSSEC_KEYSTORE_PASSWORD, "welcome");

reqContext.put(ClientConstants.WSSEC_SIG_KEY_ALIAS, "client1");
reqContext.put(ClientConstants.WSSEC_SIG_KEY_PASSWORD, "welcome");

reqContext.put(ClientConstants.WSSEC_ENC_KEY_ALIAS, "server_encr");
reqContext.put(ClientConstants.WSSEC_ENC_KEY_PASSWORD, "welcome");
reqContext.put(ClientConstants.WSSEC_RECIPIENT_KEY_ALIAS, "server_encr");

Request req = new Request();
req.setName("edwin");
req.setMessage("hi");
Response resp = request_Response_ptt.requestResponse(req);

For OWSM SAML policies see this blogpost

For OWSM kerberos policies see this blogpost

Wednesday, August 18, 2010

HTTP Basic authentication with SOA Suite 11g

There can be situations where you need to add some security like HTTP basic authentication to your Composite Services or References. Especially when you have some HTTP Binding Services or References. The HTTP Binding Service in SOA Suite 11g also has a SOAP endpoint beside the HTTP endpoint. With the SOAP endpoint you can always use WS-Security instead of the basic authentication, but if that was the case you won't choose for the HTTP Binding.    
For this blogpost I will use my http binding example of this blogpost 
In this example I have a Mediator with a HTTP Binding Reference. This reference has as endpoint the execute url of the Execute HTTP Binding Service, which is connected to the BPEL Component.
Select the execute Service and configure SOA WS Policies, Here you need to select the oracle/wss_http_token_service_policy . This OWSM policy enables HTTP Basic authentication for HTTP  & SOAP or WSS Username Token in SOAP.

For the Composite Reference you need to use the oracle/wss_http_token_client_policy.

Off course you need to provide the username / password for the basic authentication.  To do this you need to go to the Enterprise Manager Application and select your WebLogic Domain. In the Menu, select the Security menu Item and then go to Credentials.

When you don't have the oracle.wsm.security Map then you need to create this. In the Map you need to add the basic credentials Key where you can provide the username / password for the HTTP Binding Service and Reference.
After rebooting the SOA Server you can test this HTTP Binding Service. I use Wfetch of Microsoft. The internal tester client of WebLogic and Enterprise is not so great with HTTP posts and security.

First test is a POST on the HTTP endpoint with a bad username.  This gives a HTTP 403 Forbidden.
Now with a good username / password and for the POST I only have to provide the request in the body and without the SOAP envelop.

The HTTP Binding service also has a SOAP Endpoint. First we test this with a bad username.


Now with a good username / password. For the SOAP post you need to provide the Content-Type and SOAPAction HTTP Headers and the SOAP envelope with the request.

That's all.

Update by Maarten van Luijtelaar
You can have more than one account on the reference level by overriding the oracle/wss_http_token_client_policy properties. By default the value of csf-key is set to basic.credentials, but you can create a new key in EM and use that as an override.
Also, when not using the policy, adding the properties oracle.webservices.auth.username and oracle.webservices.auth.password with corresponding values will do the trick on external references.

Wednesday, August 4, 2010

WLST Scripting with Oracle Enterprise Pack for Eclipse (OEPE)

With the new OEPE 11.1.1.6 you can create and run all your WLST scripts from Eclipse. This blogpost will give you a WLST jumpstart in the Eclipse IDE. The WLST / Phyton support for the Eclipse IDE is one of the many new OEPE features. For more info read the Markus Eisele great blogpost about all the new and cool features of OEPE.

Let's do some WLST scripting. Before you can start you need to download and install WebLogic. Off course you also need to download OEPE 11.1.1.6

Start Eclipse and provide the workspace folder. 

Click on Workbench
You need to create a new Project where WebLogic can be targeted. Choose for example Dynamic Web Project. ( You don't need to create a Web Application for WLST scripting )
Provide the name of the Project and click on New Runtime.

Open the Bea or Oracle Node and select a WebLogic release. The latest WLS release is 11gR1 PatchSet 2
Browse to the WebLogic Home this is the wlserver_10.3 folder in the FMW Home.
Click on Finish.
Select your just created web project and open the project options. Go to the Project Facets and enable the Oracle WebLogic Scripting Tools support.
This enables the WLST scripting for this project.

Select the wlst folder and create a new WLST Script.
Choose for a default template or make a empty wlst file. In this case we will use "Create Basic WebLogic Domain"
This will always create a file called newWlst.py in the wlst folder.
Change the domain folder in /user_project/domains/...
Rename this wlst file else it will be overwritten by a other WLST script creation.
Select your Domain script and in Run As, choose for WLST Run.
This will create the WebLogic Domain.
Next step is to start this WebLogic Domain. Select New and go to the Server node and click on Next.
Choose for Oracle WebLogic Server 11gR1 PatchSet 2 in the Oracle node.
Browse to the new WLS Domain folder.
In the server window you can start this WebLogic server.
After the WebLogic is started, you can open the MBean Browser. Go to the Window Menu , Show View and choose Other.
Select WebLogic MBean Explorer in the WebLogic node.
This will give you an overview of all the MBeans. You can drag and drop a MBean to your WLST script.
To this WLS Domain we can add some JMS messaging by creating a new WLST Script.
Select the "Configure JMS System Resource" Template.
Rename this script.
And when you run this script you will see the output in the console window.
That's all for the jumpstart.

Sunday, August 1, 2010

SOAP over JMS with WebLogic

With WebLogic 10.3 you can also do SOAP over JMS instead of HTTP. In this blogpost you will see how you can achieve this with WebLogic JMS and with JDeveloper as IDE. The JMS transport offers the following benefits: reliability, scalability, and quality of service but it does require slightly more overhead and programming complexity than HTTP. And you can't use JAX-WS, JAX-WS on WebLogic can't use any other protocol then HTTP, you need to use JAX-RPC instead. This leads to a second problem, JAX-RPC is not well supported in JDeveloper wizards so you need to use ANT.

First step is to configure JMS. I will show you the steps on the Integrated WebLogic of JDeveloper.
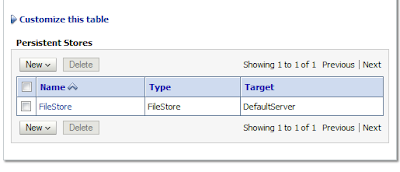
Create a persistent Store. You can use a normal FileStore and target this to the DefaultServer.
Create a JMS Server and use the FileStore and also target this to the DefaultServer.
Create a JMS Module and target this to the DefaultServer.
Create a Sub Deployment ( part of your JMS Module ) and target this to your JMSServer.
Now you can create some resources for this JMS Module. You need to create a Connection Factory and use your Sub Deployment. Create a JMS Queue and also use the same Sub Deployment. The JNDI Names are very important you need this in your JAX-RPC Web Service Class.
The WebLogic JMS part is ready, you can restart the WebLogic Server from JDeveloper and check if you see the JNDI Resources in the DefaultServer ( Go to Servers in the WebLogic Console , Click the DefaultServer, on the top of the page there is a JNDI hyperlink )

In JDeveloper you can create a new Workspace / Project.
Create a new Java Class which will be our JAX-RPC Web Service class. Here you need to add the WLJmsTransport Annotation with the queue and connectionFactory attribute. You can't use the forward slash in the JDNI name so replace this with a dot. The rest is like a normal Web Service in JAX-WS or JAX-RPC.
package nl.whitehorses.ws.jms;

import javax.jws.WebMethod;
import javax.jws.WebParam;
import javax.jws.WebResult;
import javax.jws.WebService;

import weblogic.jws.WLJmsTransport;
@WebService(portName = "HelloWorldJMSPort",
            serviceName = "HelloWorldJMSService")

@WLJmsTransport(serviceUri="HelloWorldJMSService",
                contextPath="HelloWorldJMSService",
                queue="jms.SoapQueue", 
                portName="HelloWorldJMSPort", 
                connectionFactory="jms.CF") 

public class HelloWorld {

    @WebMethod
    @WebResult(name = "result")
    public String sayHello(@WebParam(name = "message") String message ) {
      
      return message;
    }
}
Next step is to deploy this to the WebLogic Server. You need to do this with ANT. Add an empty build file to your project and the Weblogic jar to the ANT classpath.
Open the build.xml and add the following.
<project name="webservices-hello_world" default="all">

 <taskdef name="jwsc" classname="weblogic.wsee.tools.anttasks.JwscTask"/>

 <target name="build-service">
  <jwsc srcdir="src" destdir="deploy/helloWorldEar">
   <jws file="nl/whitehorses/ws/jms/HelloWorld.java" type="JAXRPC"/>
  </jwsc>
 </target>

 <taskdef name="wldeploy" classname="weblogic.ant.taskdefs.management.WLDeploy"/>


 <property name="wls.username" value="weblogic"/>
 <property name="wls.password" value="weblogic1"/>
 <property name="wls.hostname" value="localhost"/>
 <property name="wls.port" value="7101"/>
 <property name="wls.server.name" value="DefaultServer"/>

 <target name="deploy">
  <wldeploy action="deploy" name="helloWorldEar" source="deploy/helloWorldEar"
            user="${wls.username}" password="${wls.password}" verbose="true"
            adminurl="t3://${wls.hostname}:${wls.port}"
            targets="${wls.server.name}"/>
 </target>

 <taskdef name="clientgen" classname="weblogic.wsee.tools.anttasks.ClientGenTask"/>

 <target name="client">
  <clientgen wsdl="http://${wls.hostname}:${wls.port}/HelloWorldJMSService/HelloWorldJMSService?WSDL"
             destdir="src" 
             packagename="nl.whitehorses.client.jms"
             type="JAXRPC"/>
  <javac srcdir="src" 
         destdir="classes"
         includes="nl/whitehorses/client/jms/**/*.java"/>
 </target>

</project>
First step is to make an deployment with the JAXRPC option. Run the build-service target. After that you can run the deploy target.
If everything went well, you can go to the WebLogic deployments. 
 Select the Web Service and go to the Testing Tab. You can't test this Web Service with this Test Client.
 Select the WSDL hyperlink and take a look at the endpoint.
The last part is to test this Web Service. For this you need to generate a Web Service Proxy client. Run the client target in ANT. After that you can make your own TestClient where you will be using these client classes.
package nl.whitehorses.client.jms;

import java.rmi.RemoteException;

import javax.xml.rpc.ServiceException;
import javax.xml.rpc.Stub;

import weblogic.wsee.jaxrpc.WLStub;

public class TestService {
    public TestService() throws RemoteException, ServiceException {

        HelloWorldJMSService service = new HelloWorldJMSService_Impl(
           "http://localhost:7101/HelloWorldJMSService/HelloWorldJMSService?WSDL");

        HelloWorld port = service.getHelloWorldJMSPort();

        Stub stub = (Stub)port;

        stub._setProperty(WLStub.JMS_TRANSPORT_JNDI_URL,"t3://localhost:7101");
 

        try {
            String result = null;
            result = port.sayHello("Hello");
            System.out.println("Got JMS result: " + result);

        } catch (RemoteException e) {
            throw e;
        }

    }

    public static void main(String[] args) {
        TestService testService;
        try {
            testService = new TestService();
        } catch (RemoteException e) {
            e.printStackTrace();
        } catch (ServiceException e) {
            e.printStackTrace();
        }
    }
}

Here you can download my JDeveloper 11g Workspace.

Extra update from Ales.

When you want to use both one for SOAP/HTTP and also for SOAP/JMS you need to define a port for each communication protocol and it need to have its own service.

you can use the following logging options.

-Dweblogic.wsee.verbose=weblogic.wsee.connection.transport.jms.*
-Dweblogic.wsee.verbose= weblogic.wsee.server.jms.*

This shows which JMS listeners are instantiated and on which ports they are listening.