Pages

Showing posts with label jdeveloper 11g webcenter. Show all posts

Tuesday, November 8, 2011

Changing a navigation model on a page in WebCenter

WebCenter has a default navigation model (menu) which is located in the navigations folder and is defined as portal preference in the adf-config.xml file. But this menu is used in every page of the portal. I want to change this, so when you are not authenticated you will see the normal website links. But when you go to the internal page the menu will be switched to the application navigation model.
Special thanks for Maiko Rocha of the WebCenter A-Team for helping me solving this requirement.

First I create a new jspx page based on the global template called Internal.jspx and add a navigation reference to this page in the default-navigation-model.xml.


Now we can create a navigation model which will be used in the internal page. This menu has a link to the home page so the user can go back to the default menu.


Open the global template called pageTemplate_globe.jspx and go the menu part.  Here we will change the default navigation model.

from
#{navigationContext.defaultNavigationModel.listModel['startNode=/, includeStartNode=false']}

to
#{navigationContext.navigationModel[ menuSwitcher.menu ]                                  .listModel['startNode=/, includeStartNode=false']}

Where menuSwitcher is a request bean.

To determine what navigation model I need to use I will check the current page and return the right navigation reference.


The request bean


You can also use EL instead of a request bean.


<af:forEach var="node" varStatus="vs"
   items="#{navigationContext.navigationModel[ 
          controllerContext.currentViewPort.viewId eq '/oracle/webcenter/portalapp/pages/Internal.jspx' ? 
             '/oracle/webcenter/portalapp/navigations/navigationModelInternal.xml'  : 
             '/oracle/webcenter/portalapp/navigations/default-navigation-model.xml' 
   ].listModel['startNode=/, includeStartNode=false']}">


Here some pictures of the home page

After being authenticated, some extra menu links appears


And at last, the internal page with the new navigation model.


Sunday, October 23, 2011

Using FMW IdentityStore for your User management

In Fusion Middleware you can use IdentityStore framework to do all your user, role and password management. This IDM and JPS frameworks will give you a lot options which you don't have with the standaard JAAS framework of WebLogic ( you need to create your authentication provider and add a private principal to the subject).  IDM framework works really great with LDAP identity providers like the default WebLogic internal LDAP, OpenLDAP, Oracle Internet Directory ( OID ) or Microsoft Active Directory.
With this you don't need to make your own software to do some user management on a particular LDAP provider, IDM can do it for you and IDM will detect the right LDAP provider. So you just need to implement this and IDM will do all the work.

This is what you can do with IDM.
  • Retrieving and changing LDAP attributes of a user.
  • User management, search, create users in a particular LDAP provider.
  • Role management, search, create etc.
  • Retrieve a username and password from the credential store and use it in your own application.  
I will try to explain the different use cases in this blogpost.

Before we begin, is good to know how the IdentityStore will work with LDAP providers. Default it only works with the internal WebLogic LDAP. If you also want to use AD or OID, then you need to add it to WebLogic authentication provider of the myrealm security realm ( no need to add it to the jps-config.xml located at domain/config/fmwconfig ,this is only necessary when you don't use WebLogic ).
The jps serviceInstance called idstore.ldap can detect all the LDAP providers which are configured in WebLogic.
But when you have more then one LDAP providers then you got two options.
  • Add the virtualize property with value true to the idstore.ldap serviceInstance ( in jps-config.xml located at domain/config/fmwconfig ) . This will switch IDM from WebLogic to Oracle Virtual Directory mode. This will make sure that FMW applications will see all the users and roles. When you use Webcenter or SOA Suite / BPM Human worklist application then you need to add this property when you have more then one LDAP provider. In this OVD mode you can't retrieve the LDAP attributes of a user, OVD did not implement this option. 
  • Re-order the LDAP authentication providers. The first authenticator provider will be used and the other will be ignored, ( WebLogic will still use all it's authenticators for JAAS but FMW will not  ).  That's why in some forums or blogposts talk about re-ordering of the authentications providers. In most cases is setting the virtualize a better approach.  
Let's start with retrieving all the things we know about a user. Here I will retrieve its roles and all the LDAP attributes. ( this will not work with virtualize property on true and only on the first authentication provider )
Using LDAP attributes can be very handy for retrieving particular information which you can use in your application, like location information else you need to create a lot of roles to achieve the same. You can retrieve for example the location attribute and pass this value to the database ( Use it in Virtual Private Database VPD what Larry said it is a false cloud feature :-) ) or use it to disable some region screens.


Here I need to create JpsContext and lookup the IdentityStore. After that I can lookup the User with its UserProfile and retrieve the LDAP attributes by retrieving the PropertySet.


Important to know that these user operations will use the account defined in the authentication provider, there is no check if your normal user should be able to do so. So test this for a possible abuse.


These are the steps to create a new Role in your LDAP repository. Lookup the RoloManager and use the createRole method.


We can also create a user and assign a role to this new user. In this case also need to provide a AD property called samaccountname. After that I can retrieve the UserManager and use the createUser method. Lookup the role and assign to this user.


The last part is about how you can store your passwords in a safe way on the WebLogic Server. Every environment can have its own passwords and this can be managed by your Administrators.


To store a password in the credential store you can use the following wlst script.


start wlst.cmd from oracle_common\common\bin not from the the weblogic server home

connect('weblogic','weblogic1','t3://localhost:7101')
createCred(map="JPS",key="AD_ldap",user="CN=Administrator,CN=Users,DC=alfa,DC=local",password="Welcome02" ,desc="Windows LDAP user")
exit()


To allow FMW to retrieve this password I need to give the authenticated role some permissions on this map.

Open the jazn-data.xml of your FMW application, lookup the authenticated role and add the following entries
oracle.security.jps.service.credstore.CredentialAccessPermission with read permission for context=SYSTEM,mapName=JPS,keyName=AD_ldap.

Somehow I also need to do this for mapName=j2ee-app#V2.0. The WebLogic will provide some logging to say what you are missing.

And here the code to retrieve it.


You can download my sample application at github https://github.com/biemond/jdev11g_examples/tree/master/ADFSecurity

Thursday, April 8, 2010

ADF Task Flow interaction with WebCenter Composer

When You use JDeveloper 11g and ADF you probably made some independent Task Flows. To use these Task Flows you must add them as regions in your JSPX page or in an UIShell template page. The second step is  to provide the right input parameters or use contextual Events so the Task Flows will display the right data. For events you need to publish events from the Task Flows and in the JSPX page you need to subscribe to these events and invoke a ADF Method Action in a other Task Flow.
With WebCenter Composer you can do this at runtime, and change this for example in production without to program any code. In this blog I will show you how you can achieve this.
I made two TF and the first will have an input parameter and this value will be displayed in a view. This TF will also publish a simple event with a string payload and a complex event with a Map payload. The Second TF has two ADF Method Actions which can be used for the simple and complex event.
In the customizable WebCenter page you can add these Task Flows from the catalog, provide the input parameter for the First TF and intercepts the events and invoke the Method Actions of the Second TF.
Here is a screenshot of the final Webcenter page.


First step, Making the ADF Task Flow Fragments with input parameter and contextual events
Create Fusion Web Application and add the first ADF Task Flow. This must be a bounded TF with Page Fragments.

Add an input parameter to this TF.

Add a view and create the page fragment. In the view you will display the input parameter.
For the contextual Events you can use this Java Class and you need to generate a Data Control on this java class so you can use this in ADF.
package nl.whitehorses.webcenter.taskflows.view;

import java.util.HashMap;
import java.util.Map;

public class Events {
    public Events() {
        super();
    }

    public String fireEvents(String parameter) {
        System.out.println("fire event with parameter: " + parameter);
        return parameter;
    }

    public Map<String, Object> fireComplexEvent() {
        System.out.println("fire complex event ");
        Map<String, Object> eventData = new HashMap<String, Object>();
        eventData.put("text1", "hello");
        eventData.put("text2", "hello2");
        return eventData;
    }


    public String captureEvents(String parameter) {
        System.out.println("capture event with parameter: " + parameter);
        return parameter;
    }

    public String captureComplexEvents(Object parameter) {
        System.out.println("capture complex event");
        Map<String, Object> eventData = (Map<String, Object>)parameter;
        return (String)eventData.get("text1") + " / " +
            (String)eventData.get("text2");
    }

}
Generate a Data Control.
Open the Data Controls window so you can drag the methods on the page.
First drag the parameter of the fireEvents method on the page as an inputtext component, after this drag the fireEvents method on the page (a Button ). Do the same with the fireComplexEvent method ( Only a button, no parameters. ) JDeveloper will also add the Method Actions of the Data Control to the page definition.

Select the first button and go to the property window, to add a new Event on this button.

Do the same for the other button. JDeveloper will add an event to the Method actions in the page definitions.


Create the second bounded Task Flow with page fragment, add a view and create the page fragment. In this fragment you need to drag the return values of the captureEvents and captureComplexEvents methods. No need to provide the input parameters. The event handler will do this for you.


This is the layout of the Second TF.

Last step in this project to make an ADF Library Deployment.
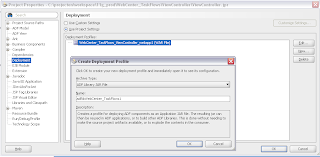
And deploy the ADF library to a jar.

Second Step, The WebCenter Project
For this step you need to have the WebCenter plugin ( Add this from the JDeveloper Update ).
Create a WebCenter project


Create an JSPX page where you will add the customizable page, panel and link component.

The customizable webcenter components are located in the Oracle Composer section.


The page looks like this.

The last step before you can run this WebCenter application is to add the Task Flows to the Composer Catalog so you can use this at Runtime.

Add an File Location in your Resource Pallette to your ADF library folder.
Select the first TF and use the right button to generate a catalog reference.
Open the default-catalog.xml in the mds folder located at the application home folder.

Add the catalog reference to this file and do the same for the second TF.

Add the ADF library to the WebCenter project.

Third Step, configure the WebCenter page.
Run the WebCenter application and press the edit button. This will open the design view.
Select the Task Flows from the catalog and add them to the page.
It will look like this and press the small edit button of the first TF.
Add an value to the input parameter
Close the dialog and press the edit button of the Second TF. Here you select the events of the First TF and select the Method actions of the Second TF. Go to the Events Tab and select the simpleEvent and the captureEvents Action. Enable this and use ${payLoad} as parameter value.
Do the same for the complex event and leave the Edit mode. You will see this as result.

That's all.

Here you can download the two applications.

Sunday, February 3, 2008

re-use components with ADF Taskflow

With ADF Taskflow you can make page fragments or pages with navigation and re-use this many times in your own applications. Build ones and implement many times. Oracle is doing this too with the webcenter components. These webcenter taskflows are isolated litte programs with its own page fragements and model. If you want to make your own re-usable taskflows then you have to know some things. In this blog I will explain the things you should know. First you have to create a fusion web application. You can ignore the adfc-config.xml this is an unbounded taskflow. Unbounded taskflow don't have a fixed beginning and ending, so it can't be used for the ADF library jar. You have to create a bounded taskflow. There are three different bounded taskflows. The first is the page fragments option. You can use page fragments to add functionality to your page. For example you make a customer info page fragment and include this on the order page or in your marketing application. The others two bounded taskflows are a bit different. This is the train taskflow ( A train is a wizard to help the user to complete the transaction ) and the other is the normal taskflow with pages and methods like a logon flow or a order entry flow. With these two options you have to leave your page and the taskflow pages are shown and when you are ready then you can return to your page.
First we create a bounded taskflow with page fragments. We open this taskflow and add a view from the taskflow menu. Create a page fragment on this view.


<?xml version="1.0" encoding="windows-1252" ?>
<adfc-config xmlns="http://xmlns.oracle.com/adf/controller" version="1.2">
<task-flow-definition id="page1">
<default-activity>page1</default-activity>
<view id="page1">
<page>/page1.jsff</page>
</view>
<use-page-fragments/>
</task-flow-definition>
</adfc-config>

The next step is to create a bounded taskflow without the option page fragements.
Here we also can create a view but now we create a page and we also create a taskflow return. Between the view and the return we add a flowcase with the name return.


<?xml version="1.0" encoding="windows-1252" ?>
<adfc-config xmlns="http://xmlns.oracle.com/adf/controller" version="1.2">
<task-flow-definition id="page">
<default-activity>startpage</default-activity>
<input-parameter-definition>
<name>param1</name>
<value>#{pageFlowScope.inputParam1}</value>
<class>java.lang.String</class>
</input-parameter-definition>
<view id="startpage">
<page>/page.jspx</page>
</view>
<task-flow-return id="return">
<outcome>
<name>return</name>
</outcome>
</task-flow-return>
<control-flow-rule>
<from-activity-id>startpage</from-activity-id>
<control-flow-case>
<from-outcome>return</from-outcome>
<to-activity-id>return</to-activity-id>
</control-flow-case>
</control-flow-rule>
</task-flow-definition>
</adfc-config>

Open the jsf page and add a button with an action "return" else we can't go back to original page. To make this more interesting we add an input parameter to this taskflow and display the parameter on the jsf page.
It is very important to give the page, taskflow and the package name unique names else you can get errors that it finds for example two datacontrols in the same package location or it uses the wrong page.
The last step is to create an ADF library jar deployment profile. This deployment profile add all the bounded taskflows to the jar. This jar you can add as library to other fusion web applications. When you do this and you create or open a jsf page then in the component panel your new taskflow are displayed.

Now you see there are two types. Taskflow and Regions, Regions are the taskflows with the page fragments option.
When you drag one of your region taskflows on the jsf page is gives you the option to create a (dynamic) region. You see the page fragment on your page. Jdeveloper adds the following code to the jsf page
<af:region value="#{bindings.page11.regionModel}" id="page11"/>
and this code to the pagedef
<executables>
<taskFlow id="page11"
taskFlowId="/WEB-INF/page1-task-flow-definition.xml#page1"
xmlns="http://xmlns.oracle.com/adf/controller/binding"/>
</executables>
You can also drag your own taskflow to the page. What now happens depends if the jsf page is part of an unbounded taskflow or not. If so then jdeveloper create a button with an action <af:commandButton text="page" action="page1"/> and update the unbounded taskflow. It adds a taskflow call and a control flow case.


<?xml version="1.0" encoding="windows-1252" ?>
<adfc-config xmlns="http://xmlns.oracle.com/adf/controller" version="1.2">
<view id="portal">
<page>/portal.jspx</page>
</view>
<task-flow-call id="page1">
<task-flow-reference>
<document>/WEB-INF/page-task-flow-definition.xml</document>
<id>page</id>
</task-flow-reference>
<input-parameter>
<name>param1</name>
<value>#{'hello'}</value>
</input-parameter>
</task-flow-call>
<control-flow-rule>
<from-activity-id>portal</from-activity-id>
<control-flow-case>
<from-outcome>page1</from-outcome>
<to-activity-id>page1</to-activity-id>
</control-flow-case>
</control-flow-rule>
</adfc-config>

JDeveloper automatically detects the input parameters.
If you don't use the unbounded taskflow (adfc-config.xml) then jdeveloper create a gobutton with a destination. The value is adf.task-flow?_id=page&_document=/WEB-INF/page-task-flow-definition.xml . If you want to add parameters to this url you have to add param1=hello param1 is the parameter of my taskflow. You can also add a return url by adding _return-url. Here an example of the gobutton. <af:goButton text="page" destination="adf.task-flow?_id=page&amp;_document=/WEB-INF/page-task-flow-definition.xml&amp;param1=hello&amp;_return-url=/webcenter_portal-ViewController-context-root/faces/portal2.jspx"/>
That's all

Friday, February 1, 2008

Dynamic jsf page with ShowDetailFrames

The 11g webcenter edition add customizable panels and Show Detail frames to jdeveloper. In this blog I use these frames to add some data to the header and right side of the page (like a homepage). I generate these frames from a backing bean. This ShowDetailFrame component is like a portlet window. You can drag these, re-order these panels or close them. You can use this for example to display some text from the database. This is how it looks.

This is how I did it. First I create a jsf page where I add Panel Stretch Layout then I add a Customizable Panel to the top which has horizontal layout and one on the end which has a vertical layout. In the beforePhase of the view I add the init method which adds the ShowDetailFrames to the Customizable Panels.

<?xml version='1.0' encoding='windows-1252'?>
<jsp:root xmlns:jsp="http://java.sun.com/JSP/Page" version="2.0"
xmlns:h="http://java.sun.com/jsf/html"
xmlns:f="http://java.sun.com/jsf/core"
xmlns:af="http://xmlns.oracle.com/adf/faces/rich"
xmlns:cust="http://xmlns.oracle.com/adf/faces/customizable"
xmlns:pe="http://xmlns.oracle.com/adf/pageeditor">
<jsp:directive.page contentType="text/html;charset=windows-1252"/>
<f:view beforePhase="#{PortalBean.initPage}">
<af:document customizationId="document70">
<af:form id="form">
<af:panelStretchLayout inlineStyle="width:642px; height:487px;" topHeight="120px"
endWidth="250px">
<f:facet name="center">
<af:activeOutputText value="Main Window"/>
</f:facet>
<f:facet name="top">
<cust:panelCustomizable id="panelCustomizableHorizontal"
layout="horizontal"
displayScrollBar="true"/>
</f:facet>
<f:facet name="end">
<cust:panelCustomizable id="panelCustomizableVertical"
layout="vertical" displayScrollBar="true"/>
</f:facet>
</af:panelStretchLayout>
</af:form>
</af:document>
</f:view>
</jsp:root>

Now we can create the backing bean

package nl.ordina.backing;

import javax.faces.component.UIComponent;
import javax.faces.context.FacesContext;
import javax.faces.event.PhaseEvent;
import oracle.adf.view.rich.component.customizable.PanelCustomizable;
import oracle.adf.view.rich.component.customizable.ShowDetailFrame;
import oracle.adf.view.rich.component.rich.output.RichOutputText;

public class Portal {

PanelCustomizable panelHorizontal = (PanelCustomizable) getUIComponent("panelCustomizableHorizontal" );
PanelCustomizable panelVertical = (PanelCustomizable) getUIComponent("panelCustomizableVertical" );

public Portal() {
}

public String initPage(PhaseEvent phaseEvent) {
ShowDetailFrame window = null;

for ( int i = 1 ; i < 7 ; i++ ) {
if ( i % 2 == 0 ) {
window = addWindow ("horizontal_dynamic"+i,panelHorizontal);
addText("horizontal is great" ,window);
} else {
window = addWindow ("vertical_dynamic"+i,panelVertical);
addText("vertical is the best" ,window);
}
}
return null;
}
private void addText (String text,ShowDetailFrame frame) {
RichOutputText output = new RichOutputText();
output.setValue(text);
output.setId("out1");
frame.getChildren().add(output);
}

private ShowDetailFrame addWindow (String name,PanelCustomizable panel) {
ShowDetailFrame window = new ShowDetailFrame();
window.setId(name);
window.setText(name);
window.setDisplayShadow(true);
panel.getChildren().add(window);
return window;
}

private UIComponent getUIComponent(String name) {
FacesContext facesCtx = FacesContext.getCurrentInstance();
return facesCtx.getViewRoot().findComponent(name) ;
}
}

Now we only have to add the bean to the adfc-config.xml

<managed-bean>
<managed-bean-name>PortalBean</managed-bean-name>
<managed-bean-class>nl.ordina.backing.Portal</managed-bean-class>
<managed-bean-scope>request</managed-bean-scope>
</managed-bean>

Tuesday, January 15, 2008

external application in webcenter 11g

In Webcenter you can already use the pdk webclipper portlet to include some external web content in your own portal, but now you can also use external content in your portal page where you have to provide credentials like your corporate webmail or an external site with a corporate login account. This is called external application.
Oracle creates for this an own credential store where it store your credentials and Oracle also provides a taskflow to manage these accounts. Too bad in TP3 you can configure it and run it in Webcenter but you can't login somehow. It looks very promising. But how can you use it in webcenter 11g? First we select the viewcontroller and right click -> New. Now we can select external application item under the General Category. Let's use otn forums as example.

Now we have to look at the page source of the otn login page to find the login url and the type of action. The next step is to find the name of the login and the password field. If you at the page source of the login page. We see that the action = https://login.oracle.com/sso/auth and the method is post etc.

Now we can add the hidden fields to the external application. With the otn site we have v,site2pstoretoken and locale as additional fields.

The next step is shared credentials for logged in user. If you leave this empty every user have to provide its own credentials and the last step is the public credentials for not authenticated users. With shared and public credentials you don't have to log in, you see the external direct. Now we have to create a new pdk java producer

We have to provide an url endpoint use http://localhost:6688/jpdk/providers/external and select associate producer with external applicatin and select otn.

In the application resourcez we can see now the otnForums producer with the flight portlet.

Now we can drag the flight portlet to the jsf page. Make sure you add security to the project and to the page. The last step is to add the extapp-change-password-taskflow from the webcenter resource view to the jsf page so we can change passwords for these external applications and with this taskflow you can use the personal credential store. We can run now the jsf portal page

Wednesday, January 9, 2008

Tagging and searching in Webcenter 11G

What is tagging in webcenter 11G? With tagging we can add keywords (tags) to pages. These tags can be found with the search taskflow. See below for the pictures. The great thing of these webcenter taskflows you can use it in a normal adf application too. You don't need a webcenter application server ( wsrp ). I don't know about the license details to use these components in normal adf applications.
What do you need to get tagging working. First you have to use taskflow ( adfc-config.xml ) In this unbounded taskflow we create the pages. We have to do this so we can click on tagged item and then it re-directs to the right page. On the jsf page we add the tagging button from the component palette ( Webcenter tagging service) . Now we have to fill in the resourceId #{facesContext.viewRoot.viewId} , this is important to link the page to the tag. In my case #{facesContext.viewRoot.viewId} = document . If I click on a tagged item then the unbounded taskflow knows which page this is and redirects to document page.

Now we add from the resource palette the tagging-launch-dialog taskflow. This is needed for the tagging popup. Add the search-toolbar taskflow to the page too.

We have to add security to the page by using the adf security wizard then open the pagedef of the jsf page so we can add view rights to the jsf page. Go to the structure window of the pagedef and start edit autorization and give the roles oc4j-administrator and oc4j-app-administrators customize, personlize and view rights.

The last step is to create the webcenter database schema and create a database connection named WebCenter in jdeveloper and we are ready to give it a testdrive.

Here you see the search toolbar and a Tags link (tagging button) Now if I click on the Tags link, the tags dialog pops up. Here we can add tags. Use the shared tag option if you want to share the tags with others
Now it's time to search for a tag. In this case I add java to the search input and start searching. A search dialog pops up and it shows the tag java and the items where it is found. In my case are that the document and search page. I can click this and it jumps to this page. Because I have a content repository connection it searches in this too.

Here we can click on More. This shows a more complex search page. Here we can save our search entries.

If we click on the tag "java" then we see this more detail search page. Here we can see who has created this tag